Garden Health Household

Witchhazel

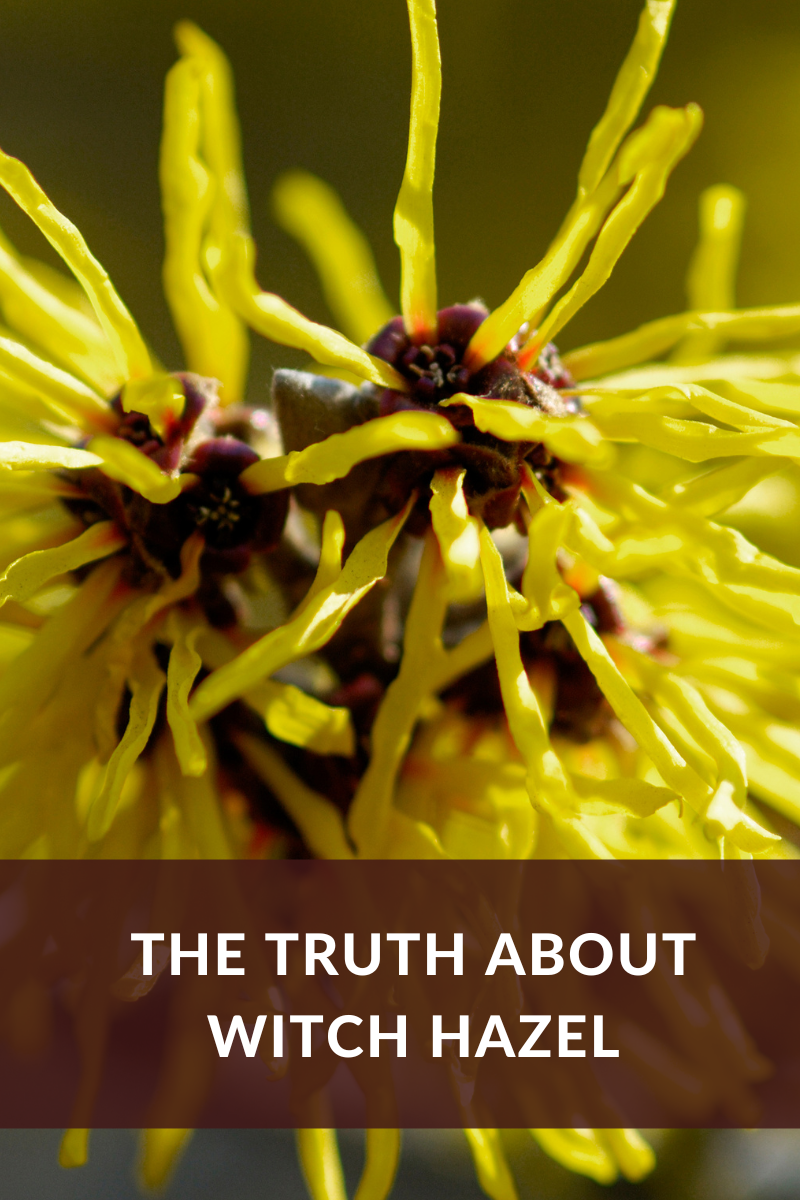
Chances are you’ve heard of witch hazel because it’s so well known for its ability to soothe sensitive skin and ease inflammation.  I was blown away when I learned how many more benefits the plant offers.

For centuries, the entire plant – leaves, bark and twigs – have been used to make medicine. 

Below are some reasons why it’s still popular today:


Inflammation- Eczema, Psoriasis

Witch hazel is perfect for inflammation, eczema and psoriasis because it’s rich

in a compound called tannins, a powerful antioxidant that helps protect your

skin against damage.  In fact, researchers say the natural antioxidants give your skin a boost and protect against free-radicals.

That’s why you often find “tannin acid” in the ingredients of your favorite skin care products.

Simply rubbing the witch hazel on your skin should offer immediate relief.


 Bug Bites, Sunburns, Diaper Rash, After Giving Birth, Acne, Scars

* Going camping or enjoying a day at the beach? Make sure to put witch hazel on once you see redness. This can relieve itchiness from bug bites and from sunburns. 

* After giving birth you can add witch hazel on your pad or use a witch hazel pad for the affected area to help reduce swelling and pain. 

* If your baby gets a diaper rash, use a little witch hazel to the area to help relieve your baby’s pain.

* Do you have a big pimple that will not go away? Witch hazel may help reduce the redness and help that pimple disappear faster.

Hemorrhoids

Witch hazel is common for hemorrhoid relief.  Just add witch hazel to a cloth or cotton ball and rub it on the area where you need pain relief.  You’ll even find witch hazel pads specifically for this condition. And it doesn’t simply help the pain. Witch hazel has hemostatic qualities showing that it may even help stop bleeding from your hemorrhoids or any other wound.


Scalp relief

Do you have an itchy or sensitive scalp? Well, rub some witch hazel up there as well! This may even be better than your dandruff shampoo as it is often used for dryness and dandruff.

Common Ways to use

You can buy witch hazel in pads, gels, ointment, and liquids to apply externally. Most of these

have alcohol in them so use cautiously to not dry out your skin, as well as alcohol-free ones.

I’ve also seen witch hazel sold as teas.  Ingesting it was a common way to get its medicinal benefits back in the day,  but some researchers today say this isn’t an herb that the more you drink, the better because taking it in large doses (more than 4 teaspoons daily) can cause vomiting, upset stomachs and even liver damage.

The FDA has only approved it for topical use on the skin.

Fun Fact

Witch hazel is a plant that most of us aren’t growing, primarily because it grows very slowly.  It can take up to 2 years before the seeds germinate, 6 years to get mature flowers.

We have an entire page of natural remedies. If you have natural remedies you choose, please share them — it takes a community!


Garden Health Household

Mullein

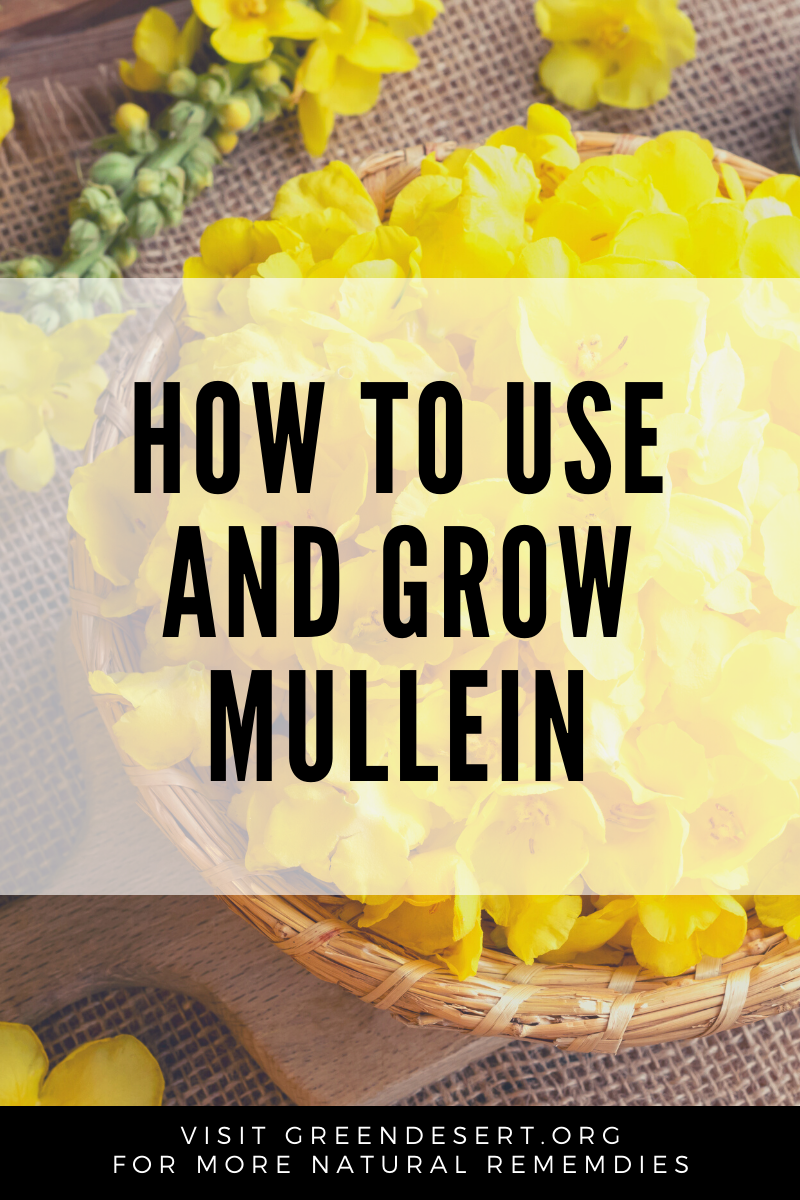
HOW TO USE AND GROW MULLEIN

The mullein plant has more than 200 species and has been around for centuries.  But recently it’s become more widely used.  So what’s the hype all about?

Mullein grows all over the country; it’s commonly known as Verbascum Thapsus. Many people consider it a invasive weed until they are introduced to all of its medicinal benefits.

Herbalists use it for a variety of issues including respiratory problems, skin conditions, to help fight viral infections, aid with ear aches, sleep, pain and so much more.  It’s also known to have anti-inflammatory properties; it’s an expectorant… so mullein is beneficial to the lungs and filled with antioxidants.

Studies show mullein has potent therapeutic properties that come from the nectar and stamens of the plant and if you get close enough, you may smell a honey-like fragrance coming from the pretty flowers of the plant.

The leaves are harvested near the bottom of the plant and used either fresh or dried to make various products.  The flowers are linked to several health benefits too.

One of the more popular ways to reap its benefits is by making mullein tea.  In fact some lab studies show adding mullein to your tea helps fight against influenza A, herpes, soothing a sore throat and cough… it’s even supposed to relieve asthma symptoms.  And the anti-bacterial properties are believed to help you get over infections faster by strengthening your immune system.  It’s also known to cleanse the bloodstream of free radicals due to its polyphenol antioxidants.

So how do you make mullein tea?

Mullein leaves and flowers are great for naturally caffeine-free tea and it’s so easy to make:

  • Bring 2 cups of water to a boil.
  • Pour hot water over 2 teaspoons of dried mullein leaves and/or flowers. Keep in mind the flowers make a sweeter tea.
  • Let the tea steep for about 10 minutes
  • Filter the tea. Some people use cheesecloth, tea balls or other types of strainers.  Whatever you use, DO NOT skip this step because mullein is covered in tiny, soft hairs and if you don’t filter them, it can irritate your throat.
  • Add your desired sweetener. I tend to use honey.
  • Once you’re done, toss the leaves into your compost… waste nothingJ
  • And you don’t necessarily have to drink the tea… let the tea cool down and gargle it for sore throats and cough.

Not much of a tea fan?  There are other ways to enjoy the medicinal benefits;

  • Ironically mullein can be smoked in order to treat lung conditions.  I had never heard of smoking anything to benefit your lungs, but research shows it actually helps.
  • Another option is to prepare an inhalant. Just boil the leaves for about five minutes and inhale the steam to help with dryness in the respiratory tissue.  It’s supposed to relieve coughs, asthma and congestion.
  • The fresh leaves and flowers are also a tasty addition to salads.
  • The flowers can be used to create bright yellow or green dyes too!

Regardless of how you use the herbs, remember dried herbs are stronger than fresh herbs. Fresh herbs have a lot of water and moisture.  I try to use fresh herbs from my garden whenever possible, but again you’re still getting the medicinal benefits from dried herbs…. Just double the amount if you’re going to use it fresh.

How to grow mullein

If you’re gonna indulge in this yummy, medicinal herb, you may as well grow it.  No, it isn’t a common herb that you’ll find in backyard gardens like mint and basil, but it grows just as easy.  In fact, you’ve probably seen the flowers on the side of the road or growing in fields and didn’t know it.  That shows you how feasible it is to have in your yard.  It’s not picky about the quality of soil but it prefers well-draining, dry or sandy soil.

It also likes lots of space.  Mullein plants can grow as tall as 10 feet high and the leaves can spread 2 feet across.

Mullein is biennial, and it’s also frost resistant.  But the plants prefer full sunlight in a dry, warm location.

It’s best to start mullein seeds indoors 6-8 weeks before the last frost in spring. Sprinkle seeds on the top of the potting soil before watering well.  Be patient, mullein seeds take about two weeks to germinate.

Keep in mind, mullein develops a deep taproot, so If you are going to move the mullein, the sooner the better.

If you have a longer growing season, you can also sow the seeds directly in the garden in late spring.

Try not to keep the soil consistently moist, otherwise. You’ll reduce growth.

Between June and October is the best time to harvest the flowers and leaves.  It’s best to use tender, young leaves.

Check out our Etsy shop for all sorts of GMO FREE seeds and teas

And no matter what the ailment, I believe there is a natural remedy to help.

We have an entire page of natural remedies. If you have natural remedies you’ve used, please share them — it takes a community!

Garden Health Household

Chaparral

Any plant that is over 10,000 years old and thrives in the sunniest places on earth has bound to have medicinal capabilities.  Introducing Larrea tridentata often called  Chaparral, Creosote bush, or Greasewood. The plant exhibits a smell of rain from the oil in its leaves.  This amazing bush thrives in desert regions including, the southwest, South America and northern Mexico.

The antioxidant properties of the bush help reduce free radical damage in the body aiding in diseases prevention. The Creosote bush contains nordihydroguaiaretic acid (NDGA), which is an antioxidant.  It has been known to block certain enzymes for tumor growth.  

According to cancer.gov, research has shown that NDGA treats several types of cancer including breast, esophageal, prostate, lung, and skin cancer. NDGA has also been recommended for treatment of Alzheimer’s disease, ALS, Parkinson’s disease, Epilepsy and Stroke.  The high antioxidant properties of NDGA helps boost the immune system lowering inflammation and suppressing viruses such as Herpes simplex, HPV, HIV-1, and Influenza.  The bush also helps with circulation by causing the blood vessels to expand.

Another benefit… it’s one of the strongest antioxidants in nature, making it a direct killer of yeast cells when its administered in high doses. The yeast-combative properties of chaparral are what makes it ideal for managing skin conditions caused by fungi.

How do you use it?

You’ll often see it sold as a tea, essential oil or a homeopathic remedy.

We live in Phoenix, Arizona … where the creosote bush thrives.  We see it often everywhere… especially on hikes, and in many yards.  So I like to clip a few branches or leaves and add it to my tea… but only occasionally.

If I have a skin issue, I use it as a balm.  Salves and balms can be made to treat skin aliments such as dandruff and psoriasis. 

Other aliments Cresote bush helps with:

  • Arthritis
  • Tuberculosis
  • Chicken pox
  • Common colds
  • Fungal infections
  • Stomach Cramps
  • Oxidative Stress
  • Cleanse the liver

If you’re considering using the medicinal properties, don’t go overboard.  NDGA may be toxic to the liver in high dosages, so this is not a daily tea.

Chaparral is not recommended for use in patients with poor kidney function due to a risk of toxicity.

Dosage ranges so it’s best to consult your doctor.

This plant is just too powerful to not use in the fight of disease, a must have in the medicine cabinet.

DIY Garden Health Household sustainability Sustainable

Start a garden

THINGS YOU NEED TO KNOW WHEN STARTING AN URBAN GARDEN


It’s planting season in Phoenix!  Do you know what to plant?  Where to plant?  How to plant?

There are so many questions when it comes to starting your urban garden – or as I like to call it – your medicine cabinet and grocery store.  And you will read all sorts of articles telling you dozens of things you need to do to be successful.  But it really doesn’t have to be that hard or expensive… especially if you know the basics.

So we came up with our top things you need to know when starting your urban garden:

  1. RESEARCH – This includes looking at a planting calendar to know what to plant in your area. And once you figure out what grows when, choose things you really will use.  Research images of what the plant will look like in your garden, how much space the plant needs, best temperatures for germination, etc.  Seed packets will give you the basics.  Don’t limit your research only to online searches.  Social media gardening groups are awesome and local nurseries can be extremely helpful.
  2. START SMALL – Doing too much gets discouraging and causes many of us to quit. Gardening doesn’t have to be hard.  4×4 is a perfect starting point for a garden and so easy to build a garden bed yourself.  Home improvement stores will cut your wood to your specified size and you can use blocks to simply place the wood slabs inside.  It’s a simple process, especially if you want to avoid cutting and drilling, etc.
  3. PREPARE YOUR BED – Grass and weeds can be one of your biggest enemies. We put cardboard at the bottom of our beds to help stop the grass.  We also have a lot of gophers in the area so we also put chicken wire at the bottom.  Fill your bed with soil… add compost…. Soil and water are the basics that will help your garden thrive or die.
  4. SAVE MONEY ON SEEDS—1st garden will be most expensive but should be the only time you have to spend money buying all of your seeds because you can save them each season.

There are lots of seed banks at libraries and other local places that may offer free seeds. 

All seeds are NOT created equal, so look for GMO Free, heirloom, open-pollinated seeds so that you can continue to save the seeds each season. 

  1. GROW WHAT YOU’LL USE – Whether it’s food or medicine, if you’re watering it, you want to use it. If you won’t eat brussel sprouts, don’t plant brussel sprouts.  Can’t sleep?  Plant chamomile for tea.  Got a cut?  Plant aloe. You’d be surprised at how many natural remedies you’ll find in your garden (ADD NATURAL REMEDIES  LINK)
  2. CREATE MICROCLIMATES AND KEEP IT ORGANIC – Planting all of the same families in the same bed means they’re all competing for the same nutrients and attracting all of the same bugs. So mix things up.  That will also create a cooler environment and help keep your garden naturally organic , especially if you consider companion planting.  
  3. PUT WATER ON A TIMER—one of biggest things to kill gardens is water so you don’t want to have to constantly think about if you’re over or under watering. Set a timer for your water —- regardless of the type of sprinkling system you choose.

OLLAS are another option for watering… my favorite because it takes guesswork out of watering. 

  1. FEED YOUR GARDEN—we fertilize about every 2 weeks with homemade worm tea, compost mix, etc. Again, don’t freak out if you’re not composting, you can buy fertilizers when you’re first starting – ONE THING AT A TIME.  Again garden groups are great for where to buy what, where to find sales, tricks of the trade, etc.
  2. BE PATIENT, STAY POSTIVE AND ENJOY THE RIDE—Everything will NOT grow and some things will look great one day and be falling over the next. It’s about trial and error, learning your soil, your garden.  Trust me, the rewards make it all worth it.  The flavor of the food is richer, you know exactly what you’re getting, you’re saving money, lowering your carbon footprint, growing your own meds… the benefits just keep coming.
  3. TREAT YOUR GARDEN LIKE YOUR FAMILY – If you’re thirsty, you need water. So do your plants.

If you’re cold, you may need a blanket.  If you’re hot, you may want shade. Same with your plants. I talk to my plants, sing to them… not sure if that makes them happy.  The peace of being in the garden in priceless, so spend time in nature, learn your garden (family) and mother nature will do the rest.


We have all sorts of DIY videos helping you throughout your journey.   Don’t be afraid to reach out and ask questions because we are all in this together.  It’s a lifestyle that keeps on giving.

Garden Health

Jiaogulan

How Jiaogulan can extend your life

I truly believe there is a natural remedy that can help almost any ailment… 

And it can be as simple as a free cup of tea.

Some of my daily ingredients are known for their miracle like abilities including moringa and hibiscus.

Another favorite is Jiaogulan… also known as the Immortality Herb… and for good reason.

When used regularly, tea from the immortality herb is believed to promote a long, healthy, disease-free life – it’s a supreme antioxidant, helps maintain blood pressure, boost energy levels, reduces bad cholesterol and enhances blood circulation… among other things.

Knowing all of that… doesn’t it make sense to add it to your daily routine?

I add Jiaogulan to my tea every day.

So for herbs this good, doesn’t it makes sense to grow them?

 We grow Jiaogulan indoor so that we can have it year round.

And it’s pretty simple to grow.

We started our plant off under a grow light for about 12 hours per day and it just took off.

The care process has been pretty simple because we haven’t had to play the guessing game with water.  Wouldn’t it be nice if your plants could talk… and you could actually understand what they were saying?

We used this Blumat watering system.

And the best part about it is the plants tell you when they’re thirsty, making it hard to over or under water them.

That in itself conserves water, a huge plus here in phoenix.

Did you know on average we get less than eight inches of rain per year? And that number is dropping.

Here’s how it works…

The system is built around clay cones called carrots.  They are stand-alone sensors that monitor the moisture in the soil and roots.

Each carrot regulates when water is released.

When the plant gets thirsty, the drippers slowly release water.  So every plant is individually watered.

What’s nice is we don’t have to use any electricity… it’s a gravity fed system, we simply have to make sure the reservoir stays full.  (We used a 5 gallon bucket for our reservoir.) 

We’ve left the system for more than four days and our five gallon reservoir still had water left when we returned, so this system definitely helped make the process more convenient – it gave us some flexibility.

Besides watering… we fertilize the plant every two weeks and that’s really it.

And since the plant is indoor we can add fresh Jiaogulan to our tea year round… just one way to grow your meds.

Whether you have a stomach ache, a cough or you just can’t sleep… look to natural remedies for some relief.

Garden Health

Dandelion

Are dandelions the new healthy coffee substitute?


Dandelions aren’t just pretty to look at, they’re an incredible medicinal plant and play a huge part in our ecosystems. They are also incredibly nutritious… and I don’t mean just nutritious for a flower.  Dandelions are more nutritious than most of the vegetables found in your fridge or garden. They’re packed with vitamins A,C, and it’s a powerhouse of iron, calcium, magnesium and potassium. Even more, the pretty yellow flowers can practically grow anywhere, which is one reason why it’s known to some as weeds. It’s a weedy perennial that will continue to grow annually and will take over your yard if you let it.


Before we get into more benefits, let me give you a little background on how the plant has sunk its roots deep into history.

The official name is Taraxacum officinale but they’re commonly known as dandelions. 

It’s not a coincidence that “lions” is in the name of the flower.  They were actually named after lions because their lion-toothed-leaves are believed to heal so many ailments, big or small, including dandruff, baldness, sores, fevers, stress, depression and the list goes on.


Dandelions were highly prized to the ancient Egyptians, Greeks and Romans, and were also used in Chinese traditional medicine for hundreds of years. The Native Americans used the plant as a source of food and medicine.


MORE MEDICINAL BENEFITS

One of the biggest benefits is that you can use the entire plant… leaves, stem, flower and root for medicinal purposes.


  • The leaves of the plant acts as a diuretic, also known as “water pills”. They work by increasing the volume of urine that you produce and altering your body’s electrolyte or body salt compositions. Bottom-line, they are supposed to help you urinate more because they rid the body of excess fluid volume.  Diuretics are also used to treat blood pressure, liver disease, heart failure, and different types of kidney diseases.


  • Dandelions are also high in antioxidants – the roots contain beta-carotene, an antioxidant known to help protect cells from damage. The flowers of the plant is also full of another type of antioxidant called polyphenols.


  • Scientists also say dandelions contain bioactive compound, which they believe may help lower your cholesterol.


  • Dandelions are also known to be a mild sedative and consequently can have a very calming impact on the mind and body.


  • Dandelion roots and leaves were used to treat liver problems and today is it’s believed to help detoxify the liver.


HOW TO USE IT


Make tea! You can make tea using the flowers, leaf and root – just make sure if you picked it from someone’s yard, that it hasn’t been treated with chemicals.

If using the flowers and leaves… just wash a handful, boil some water and then let the dandelions steep for about 10 minutes. This version tends to be a little lighter and sweeter than a dandelion root tea.


Drink it as a coffee substitute! Thanks to its bitter, rich, coffee-like taste, the root of the dandelions makes for the perfect caffeine-free morning drink.  Roast the roots to a dark brown color, steep it, strain it and ENJOY.  Many call this option Dandelion coffee or Dandelion root tea.


For the root tea, the process is much longer (up to 3 hours of roasting) but the tea is more potent –you’ll want to chop it into small pieces, after you wash them of course.  Then heat it in the oven for about two hours before steeping 2 teaspoons in hot water for about 10 minutes.


You’ll still get benefits if you make a quicker tea using the roots – just chop them, then cover the roots with boiling water for a few minutes.  Next just strain it and voila – instant dandelion tea.


Add it to your meals! You can also add the leaves and flowers to your salads and other meals—cooked or raw.

Some people even use the flowers to make wine! (Let me know if you try this oneJ)


HOW TO GROW

Now that you know how to use it, it makes sense to grow it… considering it’s so easy to grow that it’s considered a weed.  Chances are you see it all the time on the side of the road, not knowing that you’re looking at a nutritional powerhouse.

But growing it yourself ensures there aren’t any harmful chemicals in your “weeds”.

It’s also beneficial to grow near other plants because their pretty flowers attract lots of beneficial insects!

Dandelions can grow almost anywhere.  They can grow with poor soil conditions and can even withstand frost and freezes.

But ideally, the plants like fertile soil and full sun, although they will survive fine in partial shade and some say the leaves taste better with part shade.

Take the Dandelions seeds and press them directly into your soil, ¼ inch deep or just sprinkle them on the soil surface, anytime from early spring to late summer (soil temperature should be at least 50 degrees).  Be sure to cover the seeds lightly because they need a little light to germinate.  Plant them about six inches apart and they should sprout within 10 days.

Be sure to keep the seeds moist until they germinate.


They bloom in the spring and fall, so plan to keep them around because they continue to reseed themselves.


If you’re more interested in the roots than the flowers, start harvesting the flowers before they produce seeds to get larger roots. Preventing the flowers from going to seed will also give you more control to keep the plant from spreading all over into weeds.

Also keep in mind, although the plant will survive, insufficient moisture and heat will cause the leaves to taste bitter.


FUN FACT

Dandelions aren’t just great for us, they are a good source of food for birds and bees.


We have an entire page of natural remedies. If you have natural remedies you choose, please share them — it takes a community!

Health

Ginger

WHY YOU’LL WANT TO ADD GINGER TO YOUR MEDICINE CABINET

Most of us have experienced stomach aches, inflammation, and/or menstrual cramps.  It can all be painful, frustrating and exhausting.  But before you turn to over the counter meds, try GINGER.

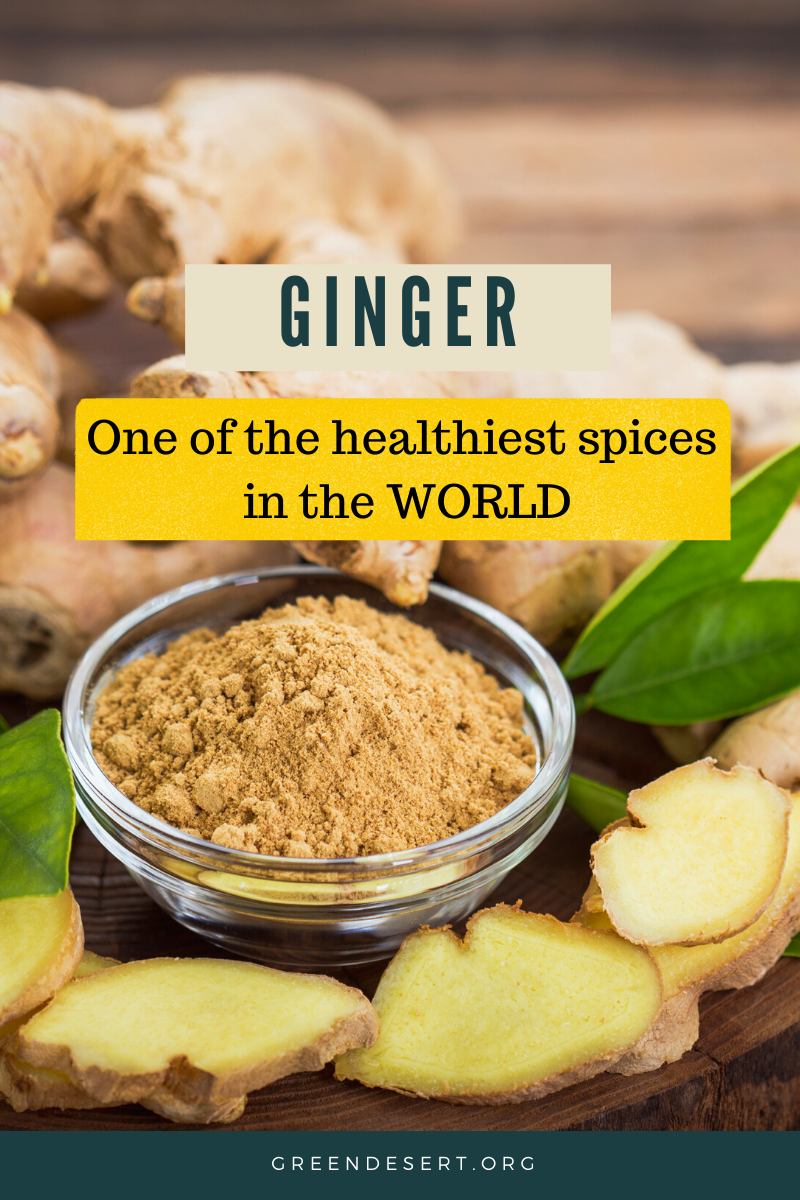
It’s one of the healthiest spices you’ll find in the world!  In fact it’s been used in cooking and medicine since ancient times and it’s got the stats to back up its healing powers.

Before we go into all of the benefits, let’s talk about its history.

Ginger is technically known as (Zingiber officinale).  It’s not the leaves or flowers that attracts most of us, it’s what the plant is hiding underground that will spark your interest because that’s where you’ll find the good stuff… stuff so good that in the 14th century England, a pound of ginger cost as much as a whole sheep.  Although many people call it ginger root, it’s technically a rhizome (an underground stem).  It has light brown thin skin that requires no peeling and is very tender. 

Ginger is a close relative of turmeric and cardamom. It’s native to southeastern Asia and has spread throughout the world.  Ancient writings from several countries, including China, Rome and Arab countries all describe ginger as a medicine.  The yummy flavor ginger adds to food is just an added benefit.

Its versatility makes it even more popular because there are so many ways to reap its benefits; You can use it fresh, dried, powdered or even as a juice, oil and tea.  And with all of its assets, you’ll definitely want to add it to your daily diet.

So let’s talk about the benefits.  WARNING… there are tons!

The main ingredient responsible for all of this goodness is called Gingerol. Gingerol has powerful anti-inflammatory and antioxidant effects, which in theory boosts your overall immunity.

The plant is known to be loaded with vitamin C, B6, magnesium, potassium and copper.

Digestive System

Those same healing properties help the digestive system.  It warms the stomach.  That along with its anti-inflammatory and antibacterial properties aids in healing stomach ailments.  That’s why it has such a positive effect on stomach aches, indigestion, nausea, even menstrual cramps are common ailments that ginger helps relieve.  It’s actually right up there with pain meds like ibuprofen for its menstrual pain relief.

When I’m feeling nauseous, I start with ginger tea.

It’s even recommended for pregnant women struggling with morning sickness.

Arthritis

Those same antioxidant and anti-inflammatory properties are known to help manage the joint pain of arthritis.  In fact, according to the Arthritis Foundation (AF), the chemicals in ginger block inflammation pathways in the body.  They suggest taking a maximum of 2 grams of ginger per day, divided into three doses.  Another option is to drink up to 4 cups of ginger tea per day.

Cold/Cough/Flu

Some people also use ginger as a home remedy to prevent coughs, colds and flu.  The idea is its warming effect helps because it keeps you warm and also helps your body sweat out infections.  And we can’t forget all of the antibacterial properties… which may even help sooth a sore throat. 

Migraines

If you’ve had migraines, you know nothing seems to help.  Some people who suffer from migraines swear by ginger as a way to get relief.

Some say they make fresh ginger tea, others add ginger powder to a few ounces of water, others make a paste or oil and rub it on their forehead.

Weight Loss

Ginger has a very positive effect on obesity and weight loss. Ginger supplementation in particular helps reduce body weight, waist-hip ratio. Ginger’s ability to help increase the number of calories burned or reduce inflammation is a sure way to take off some of those unwanted pounds.

Ginger has so many different uses it’s hard to discuss them all.

It can also fight certain infections and bacteria, and is a useful oral bacterium such as gingivitis and periodontitis. 

Bottom-line, there is no denying the miracles of ginger and there are so many ways to use it:

  • Making ginger tea
  • Adding ginger root or powdered ginger to meals
  • Using it in oil or cream form
  • Taking it in capsules
  • Sucking on lozenges

How do you use ginger?  And have you grown it?

See planting instructions below… and a simple recipe to make ginger tea from fresh ginger root (rhizome)!

How to Grow Ginger

Ginger is popularly grown in warmer tropical regions.

You can grow ginger from rhizomes found at grocery stores, farmers markets or simply order them online.  The one thing to consider if you use the rhizomes from the grocery store is often stores spray their ginger to keep it from sprouting in the store… so it may not always be consistent.  For that reason, I prefer organic growers, although some people say if you soak the grocery store ginger, it will remove the growth retardant.

To start, you want rhizomes (ginger root) that have developed eyes or growth buds.  Ideally you want the ginger to have multiple “fingers” extending from it.

  • Cut the ginger root into 1-2 inch pieces making sure each piece has at least one eye.
  • Let them sit to callous for up to 2 days – similar to potatoes
  • Make sure your soil is has lots of organic matter to help with drainage… so add compost. It’s crucial that the soil hold moisture but doesn’t become waterlogged because ginger doesn’t like sitting in water for long periods.
  • Ginger likes heat, but not necessarily direct sunlight, so an ideal location would be under the shade of a tree or any place that gets part-day shade or even under shade cloth.
  • As for timing, ginger doesn’t like cold, so wait until the temperatures are consistently above 60 degrees – which means in warmer climates like Phoenix, you can pretty much plant any time of the year. March is ideal in Phoenix.  (For cooler climates, you can plant in a pot indoors)
  • Some people prepare their rhizome by soaking them in water overnight. You can also use the wet paper towel method – wrap your rhizome in a wet paper towel, seal it in a plastic bag and wait for the roots to show up before planting.  You can also plant the rhizome directly into the soil.
  • Plant each piece of the rhizome 12 inches apart, one inch deep. Make sure the healthiest looking eyes face upward.
  • Water the rhizomes deeply immediately after planting.
  • As your rhizomes grow and multiply, keep adding soil. Remember, ginger is innately a tropical plant, so don’t let the soil get too dry.
  • Your ginger plant will eventually grow up to 4 feet tall.
  • It’ll take up to 10 months before you can start harvesting, and the older it is, the better the flavor.


How to make fresh Ginger Tea in 10 minutes

What you’ll need for 4 servings:

  • Fresh Ginger Root sliced thin – 2 slices per cup (You can freeze leftover ginger root)
  • 4 cups of water
  • Lemon (optional – 1-2 slices per cup)
  • Sweetner (optional – I use 1 tablespoon of honey per cup)

Now what:

  1. Thinly slice your fresh ginger. You don’t need to peel it first, but do rinse it off to remove any visible dirt. Plan on using a one to two-inch piece of ginger per cup of tea.
  2. In a saucepan, bring your water to a boil. water (use one cup of water per serving)
  3. Add your ginger to the saucepan and reduce the heat to a simmer.
  4. Let is sit 5 to 10 minutes – the longer it sits the stronger it’ll be.
  5. Pour the tea through a strainer to e to catch all of the ginger.
  6. Flavor it to your desire. I add a slice of lemon and tablespoon of honey to each cup.

A simpler way… I just add the ginger root to my tea cup, pour my boiling water over it and let it sit for ten minutes before adding my sweeteners.  I use 1 or 2 slices per cup.


We have an entire page of natural remedies.  Let us know if you have any of your own.

DIY Garden Health

Zucchini boats

How to make zucchini boats using ingredients you already have!

Got zucchini? We’re making stuffed zucchini boats and if you have the zucchini, you really shouldn’t have to leave home for ingredients!  You can really use your leftovers to stuff them — hence cleaning out the fridge and bringing you closer to zero waste.  It’s a win-win!

So we will make the recipe according to what I had in the garden and in my fridge….

One ingredient that isn’t flexible is your zucchini… you’ll need large ones to use as your shell.

Trim the ends of the zucchini, cut them in half lengthwise and scoop out your seeds and pulp.  Don’t toss it… you can use the pulp and seeds as one of the ingredients.  I save my seeds for planting and I share them on our Etsy site

Back to the ingredients… again use what you have.  I grabbed onions, bell peppers and more zucchini from the garden and chopped it all up before adding it to a skillet.  This is where you would add your zucchini seeds and pulp.  Cook the ingredients for about five minutes.

Next you’ll spoon everything into your zucchini boat.

I started with tomato sauce, then black rice, cooked veggies and topped it all off with vegan cheese.

Let it cook at 350 degrees for about 30 minutes.

Garnish it with fresh veggies and you’re done… Looks and tastes so yummy and you can make it as healthy or decadent as you want.

Let us know if you make it and if so, what ingredients you use! 

RECIPE DETAILS

Ingredients (Flexible)

  • 2 large zucchini
  • 1 small onion, chopped
  • 1/2 cup chopped bell peppers
  • ½ cups shredded cheese
  • Other ideas – mushroom, rice, beans, spinach

Directions

  • Trim the ends off zucchini. Cut zucchini in half lengthwise; scoop out seeds and pulp.  Save the pulp/seeds for the meal, or save the seeds for planting.
  • Add ingredients to a skillet…  I used onions, bell peppers, and sliced zucchini.  Cook for about five minutes
  • Spoon everything into your boat, I started with tomato or spaghetti sauce, then added some leftover black rice, then my stir-fried ingredients and topped off with vegan cheese. 
  • Place in a greased 13×9-in. baking dish and bake, uncovered, at 350° until zucchini is tender, about 30 minutes.
  • When finished, add fresh garnish.  I used onion and society garlic chives from the garden.  DELISH!


Health

Cacao

Do you love chocolate? I do!

I’m sure you’ve heard all of the reports that chocolate is bad for you… and other reports that say chocolate is simply getting a bad wrap and it’s actually healthy.  Well, both sides are right… kind of.

Most of the chocolate you find in stores these days have high amounts of sugar, tons of calories and there are even animal products like milk and butter — lots of it.

It turns out there is a healthier alternative – just take the traditional chocolate, minus all of the added sugars and other stuff.  You’re left with an ingredient that’s actually considered a superfood — CACAO.  

The cacao tree produces pods. Inside each pod, you’ll find more than 30 cacao seeds. When you eat chocolate, you’re eating the seeds of the cacao fruit.

It’s technical name is the Theobroma cacao tree—which translates to “food of the gods,” because the Mayans and Aztecs believed it was a gift from God… and for good reason.

But before we talk about the benefits… There is a distinction that should be noted between chocolate, cacao, and cocoa. The term cacao is reserved mostly for seeds that have not been roasted, while cocoa is used to refer to any manufactured product from the seed which would include chocolate.

Now let’s talk more about why some of our ancestors put cacao on such a high pedestal;

Cacao is one of the highest sources of magnesium in nature, full of iron, zinc, copper and selenium.

Even more, the seeds are full of polyphenols, which are plant compounds with antioxidant properties. And it’s not a small amount…

Cacao contains more antioxidants per gram than blueberries, goji berries, red wine, raisins, prunes and even pomegranates.  And those antioxidant properties have been shown to protect you from diseases like cancer, diabetes, and heart disease.

Cacao also packs more calcium than cow’s milk… so it’s definitely a powerhouse.

With all of those vitamins and nutrients, it makes since that consuming cacao can help with conditions like stress and depression, heart health and even help reduce blood pressure.

And that’s not all — is also rich in flavanols. Flavanols help support neuron production, brain function and improve blood flow and supply to brain tissue.  They’ve also been linked to the prevention of age-related brain illnesses, such as Alzheimer’s. 

I could go on and on about the benefits of adding Cacao to your daily diet.

That being said, it doesn’t have the same sweetness as chocolate.  It’s actually more on the bitter side, closer to a coffee bean.

You can find cacao in several forms… nibs, powder, butter, even a paste.

So how do you consume it?

We eat raw cacao daily and I’ll admit, it’s not like eating chocolate.

But there are lots of ways to add it to your daily diet… including blending it into a smoothies, adding it to warm coconut milk with a little honey and vanilla, you can even add the raw cacao nibs to your trailmix!

You’ll get the most nutrients and antioxidants by eating it raw.

And if you are really craving chocolate, pure dark chocolate is best.  Look for a cacao content of 70 percent or more.  That’s what I use for baking.  So be creative… it’s worth the benefits!

More Fun Facts —

The cacao trees are native to Central and South America, but they can also be found in Africa, too. In fact, 70% of the cacao produced today comes from Africa.

As for growing… I’d LOVE to own a cacao tree, but unfortunately Phoenix isn’t close to ideal. Cacao trees really only prosper in warm rainforests and if you want to grow your own you’ll have to replicate that environment. Hawaii, parts of southern Florida, and southern California are examples of places in the U.S. where you can have better luck.

Let me know if you are successful!

Cacao is just one nature’s secrets to living a healthier lifestyle.  We have an entire page of even more natural remedies. If you have natural remedies you use, please share them — it takes a community!

Health

Chamomile

It’s known in my household as sleepy tea because of chamomile’s calming effect.

But it’s so much more than that.

Chamomile is one of the most commonly used herbs in tea, and that isn’t simply for its great flavor. It has a multitude of health benefits that will make you want to add a cup to your daily routine!


Chamomile has a high antioxidant content as well as many calming properties. It has long been used to treat anxiety and nervousness because of its ability to soothe the nervous system. That of course can also help reduce stress. The calming properties make it a wonderful sleep aid too.. Again it’s why we call it sleepy tea.. A cup of chamomile tea is often useful when you want to get to sleep, and stay asleep. 


Stomach aches are another thing that chamomile can relieve. It is well known for its ability to aid digestion and overall gastrointestinal discomfort. That makes chamomile a great natural remedy for stomach pain, indigestion and diarrhea. 


The antioxidants in chamomile make it a very versatile healer, too. Internally, chamomile has been shown to reduce blood sugar and bad cholesterol. This means that it can help keep the heart healthy and be a preventative to high blood pressure and heart disease, as well as a treatment aid to certain diabetes conditions. Externally, chamomile can be found in many skin products as it can reduce the effects of eczema, and overall improve the glow and complexion of your skin.


With all the benefits of chamomile, it’s a great thing to have around, so the fact that it is quite easy to grow makes it even better. Chamomile does well in full sun, although it prefers the weather stay below 100 degrees. So growing in the early spring in Arizona will be best for the plant. 

To plant from seeds, you simply scatter the seeds and softly press them into the soil.  Don’t cover them with soil because they need light to germinate. Water them immediately and continue to water the seeds consistently for one to two weeks while they germinate. Once the plant starts to grow, not much watering is needed. Then when it’s time to harvest, you can dry the flowers out in a jar and you have a healthy, natural homemade herbal remedy. 

We actually take our flowers fresh from the plant and add them to our tea.


Even if you’re not a grower, chamomile is widely available. You can find it in skin care products, capsule form or, most commonly, as a tea. So consider a cup of chamomile as a healthy addition to your routine. Oh and a little bonus – refrigerate those tea bags after use, and they might be able to get rid of those dark circles under your eyes too!


We have an entire page of natural remedies. If you have natural remedies you choose, please share them — it takes a community!