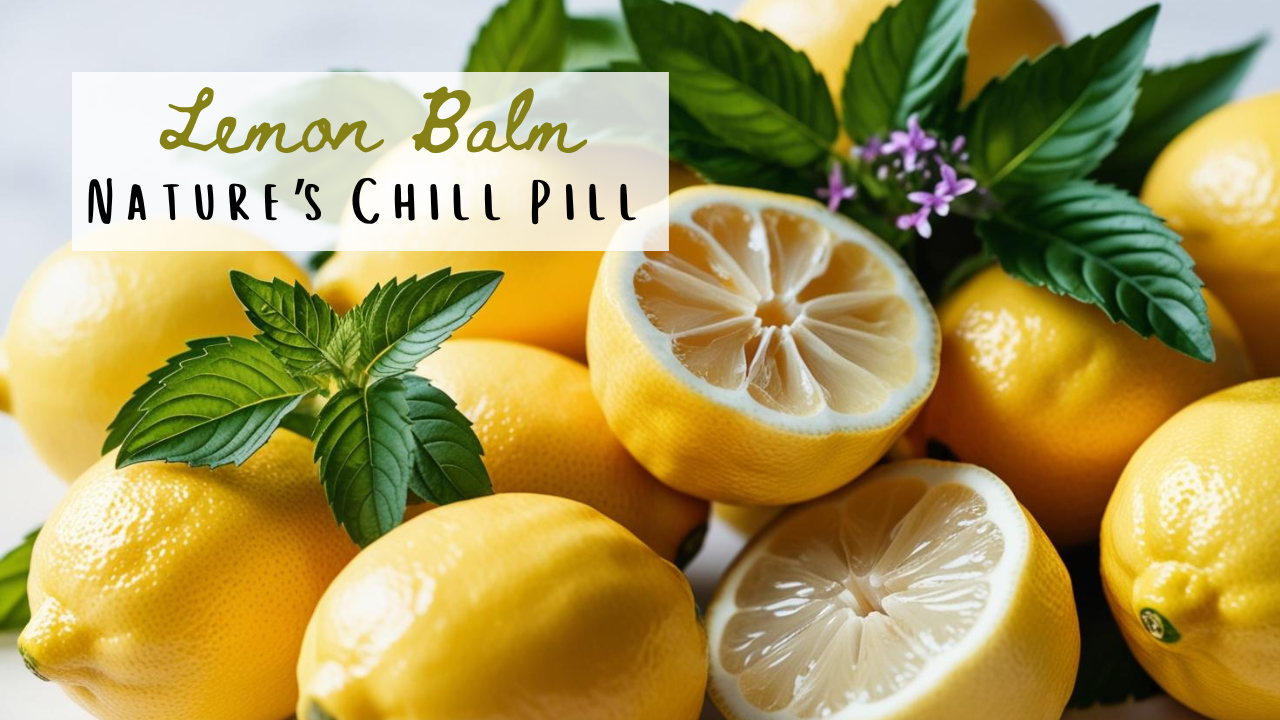
Garden Health Household

Broccoli

The Right Way to Eat Broccoli for Healing 

You probably have broccoli in your fridge right now, ready to be tossed into your next meal. It’s one of those go-to vegetables that’s perfect in everything from casseroles to salads. What if I told you that broccoli has been used for centuries, not just for its delicious taste, but also for its healing properties? It’s an ancient superfood with modern health benefits.

Packed with nutrients, it’s a natural remedy that can support everything from detoxification to bone health. 

Let’s dive into the incredible benefits of broccoli as a natural remedy! 

History Lesson 

Broccoli traces its origins to the Mediterranean region. Its medicinal and health-promoting properties were recognized by ancient civilizations, including the Romans and Greeks, who valued it for its ability to promote vitality and aid digestion. 

  1. Digestion and Gut Health 

Broccoli has a high fiber content, making it the perfect food to aid digestion and prevent constipation. It also acts as a prebiotic, which means it feeds beneficial bacteria in your gut to keep it healthy. 

Note: Steamed broccoli is particularly beneficial because it is soft on the stomach and retains fiber. 

  1. Immune System Support 

When you think of foods with vitamin C, fruit probably comes to mind before any vegetables. You may be surprised to learn that broccoli has a high vitamin C content. Along with other infection-fighting minerals, like zinc and selenium, adding broccoli to your diet can reduce infections and support a healthy immune system. 

  1. Liver Health and Detoxification 

Broccoli contains sulforaphane and chlorophyll, minerals that are synergistic-meaning that they have a greater effect when combined. The sulforaphane removes harmful toxins from your liver by activating detoxification enzymes, then, the chlorophyll cleanses your blood and neutralizes the toxins. Broccoli’s detoxification properties keep your liver and overall body young and healthy!

  1. Heart Health and Blood Sugar Regulation 

The high fiber content in broccoli can help lower blood pressure, improve circulation and even prevent blood sugar spikes! The sulforaphane in broccoli can improve your sensitivity to insulin, making it beneficial for diabetes, and protect against damage to your blood vessels. Broccoli is a great ingredient and tool to maintain a healthy heart and regulate your blood sugar. 

  1. Supports Bone Health 

Broccoli is rich in nutrients like calcium, vitamin K and magnesium, all essential for strong bones and preventing osteoporosis (a condition where bones become extremely weak). Broccoli also supports and promotes bone regeneration due to its high levels of sulforaphane. 

  1. Anti-Aging and Skin Health 

The antioxidants and vitamins in broccoli help to keep your skin looking youthful and clear. Its high vitamin C levels boost collagen production, which aids in keeping your skin firm and prevents wrinkles. The antioxidants protect your skin against UV damage and can help clear acne breakouts. 

4 Recipes to Use Broccoli in Everyday Life 

  1. Broccoli Smoothie 

This easy recipe is great for strengthening immunity, cleansing your liver and flushing out toxins. Blend it up for a daily smoothie. 

Ingredients 

  • Raw broccoli and/or broccoli sprouts 
  • Cucumber 
  • Green apple 
  • Ginger 
  • Lemon juice 
  • Coconut water 

You can mix up ingredients depending on what you like best. For best detox results, drink in the morning or on an empty stomach.

   2. Broccoli Soup 

The high fiber in broccoli soothes digestion and prevents constipation. It is a great way to support the overall health of your gut. 

Ingredients 

  • Chopped broccoli 
  • Carrots 
  • Chopped onions 
  • Garlic clove 
  • Vegetable broth 
  • Olive oil 
  • Salt and pepper 

Keep the olive oil in a pot, sauté the onions and garlic until it is fragrant. Then, add carrots, broccoli and broth. Let that simmer for about 15 minutes and then blend until smooth. For the best digestion support, eat this soup warm right before bed. 

  1. Broccoli Juice 

The fiber and antioxidants in broccoli can regulate blood sugar levels and support heart health. Making a juice is an easy way to soak up all of these natural medicinal effects. 

Ingredients 

  • Raw broccoli 
  • Spinach 
  • Cucumber 
  • Green apple 
  • Water 

Blend all of these ingredients until they are smooth, strain the juice and drink once daily. 

  1. Broccoli Face Mask 

The vitamins and antioxidants in broccoli can fight acne, reduce wrinkles and even brighten your skin for a youthful glow! 

Ingredients

  • Steamed and mashed broccoli 
  • Honey 
  • Plain yogurt 

Mix these ingredients into a paste, apply it to your face, leave on for about 15 minutes and then rinse with warm water. For the best results on your skin, use this homemade face mask twice a week. 

Broccoli is a great vegetable to start or add to your garden. The official plant name for broccoli is brassica oleracea. 

How to Grow Broccoli at Home 

  • Plant in a sunny area: Broccoli needs at least six hours of direct sunlight per day in order to grow and survive. 
  • Start from seeds: Start the plant indoors and move to outside when you see a few leaves growing. When transplanting to your garden, plant the seedlings one to two feet apart. Watering: Plants should be kept moist and watered about an inch per week. Harvesting: Cut the heads of the broccoli off when they are firm (about 60 to 90 days after planting). 

Broccoli has always been an important and delicious vegetable – but now we know just how many natural health benefits it contains! It’s the perfect choice of vegetable to add to your garden and your cooking. 

If you have any ideas or suggestions on what natural remedies and herbs work best, please reach out! I love learning new uses for these powerful plants and herbs! 

Explore our whole page of natural remedies! Here at GreenDesert.org, we’re always looking to grow our community. If you have ideas, please share them!

Garden Health Household

Thyme

The Power of Thyme: Exploring Uses for Health and Healing

 Love thyme for so many reasons – the smell, taste, the way it looks in the garden… but most of all for its natural healing abilities. I’m guessing that most of you probably have thyme in your kitchens and use it in many of your recipes.

For centuries, thyme has been used as a medicinal herb, offering accessible and straightforward home remedies.

So, what are the natural benefits of thyme and how do you use it? Let’s talk about it!

A Quick History Lesson

Thyme was first used by the ancient Egyptians, in their embalming processes, and Greeks believed that thyme was a symbol of courage and was used as a remedy for various ailments.

  1. Improves Respiratory Health

If you’re experiencing a cough or congestion, thyme is a great way to open your airways and loosen mucus. Thyme is an expectorant, which increases the production of saliva and thins mucus.

How Use It:

  • Boil a pot of water, then turn off burner
  • Add a sprig of thyme
  • Let it soak in the hot water for about 10 minutes
  • Remove from heat and pour yourself a cup of tea

Optional Additional Ingredients:

  • Ginger
  • Honey
  • Berries
  • Lemon
  • Garlic

This natural herbal tea is great for loosening mucus. To see the best result, drink 2-3 cups a day.

  1. Reduces Cold and Flu Symptoms

One of the main properties in thyme is thymol, which has strong antibacterial and antiviral effects. What does that mean? Well, thyme can help fight off viruses and bacteria that cause your cold and flu. This healing herb’s anti-inflammatory properties can reduce inflammation and irritation in your nose, throat and chest. While thyme tea will reduce cold and flu symptoms, there are additional uses to knock your symptoms out!

How to Use It:

  • Boil a pot of water
  • Add a few (2-3) thyme sprigs
  • Place a towel over your head and the pot as you lean over the pot
  • Breathe deeply for 5-10 minutes

Another way to accomplish this steam inhalation technique is to make a thyme steam bath. You can do this by adding a few sprigs of thyme to your warm bath. These techniques soothe inflammation in your lungs and throat, and ease respiratory discomfort and congestion.

  1. Helps Heal and Reduces Severity of Cold Sores

Cold sores are blisters around the mouth and lips, caused by the HSV-1 virus. The antiviral properties in thymol can reduce the severity of your cold sores and prevent them from spreading.

How to Use It:

  • Place a few sprigs of thyme (or about a 1⁄4 cup of dried thyme) in a jar
  • Cover thyme with olive or coconut oil
  • Seal the jar
  • Sit the jar in a warm and sunny spot for 1-2 weeks and shake the jar every other day
  • After 1-2 weeks, strain out the thyme and store it in a new, clean jar
  • Apply thyme oil to your cold sore as needed

This simple thyme essential oil recipe helps get rid of cold sores due to its antimicrobial properties. You can also dilute store-bought thyme essential oil with coconut, olive or almond oil and apply it directly to your cold sores 2-3 times a day.

  1. Supports Digestive Health

The carminative (gas-relieving) and antispasmodic (reduces cramps and pain) properties of thyme make it the perfect remedy for digestive discomfort and health.

How to Use It:

  • Place a small handful of dried thyme in a jar
  • Add about 5 ounces of high-proof alcohol (vodka, brandy, etc.)
  • Seal and shake the jar
  • Store the jar in a dark and cool place for 2-3 weeks and shake every 1-2 days
  • After 2-3 weeks, strain out the thyme
  • Transfer the strained liquid, or tincture, into a dropper or clean jar and store in a dark and cool place
  • Take 20-30 drops of the tincture a day to support digestive health

The above tincture recipe supports digestion and gas relief. You can also add the tincture drops to water, tea or juice to help the taste.

Practical Tips for Using Thyme in Everyday Life

  • Tea: Brew thyme-infused tea to support digestive and respiratory health. It can also help with

your skin health, menstrual pain cold, symptoms and even anxiety!

  • Inhalation: Boil thyme to clear congestion and help with cold and flu symptoms.
  • Cooking: Add thyme to soups, stews, chicken and drinks for a natural immunity boost.
  • Oil: Use either store-bought or homemade thyme essential oil sparingly. It can be applied

topically or used in aromatherapy to reduce anxiety and stress.

How to Grow Thyme at Home

Get creative and grow your own thyme! The official plant name is Thymus vulgaris.

  • Plant in a sunny spot: Thyme thrives in the sun and needs at least 6 hours of direct sunlight per day.
  • Use well-draining soil: Thyme does not like soggy soil! Ensure your thyme has proper drainage.
  • Water moderately: Thyme prefers dry conditions and, once established, is drought-tolerant and doesn’t need as much watering. Water only once the soil feels dry but avoid overwatering.
  • Prune and Harvest: Trim long stems regularly to promote growth. After a few months, or once your thyme has matured, snip just above the leaf nodes (where the leaves grow) so the thyme will continue to grow.


Thyme has many natural health benefits and remedies. The above recipes can be used in combination with other medicinal herbs to relieve stress, muscle pain, cold symptoms and menstrual cramps. They can also support digestive health, your immune system and your skin health. The good news is that thyme is a perennial plant, meaning that once it’s established, it will keep growing without the need to replant.

I love learning new uses for these herbs and what remedies work best, so, please share your thoughts and suggestions!

Explore our whole page of natural remedies! Here at GreenDesert.org, we’re always looking to grow our community. If you have ideas, please share them!

Garden Health Household sustainability Sustainable

Bay leaves

Burn It, Brew It, Breathe It: Why Bay Leaves Are Magic

I’ll admit, I’ve been using bay leaves for years, in my beans and soups. Why? Because that’s what I’ve watched my elders do, and that’s what a lot of recipes said. It wasn’t until recently I realized how much more it is than just a seasoning. It’s actually been used for centuries for its health benefits… ones that are simple to get and may surprise you.

So let’s talk about the legit benefits and how to use them in ways that feel doable and, most importantly, effective.

A Quick History Lesson

Since the time of the ancient Greeks and Romans, bay leaves were believed to symbolize wisdom, protection, and peace. Fast forward to today, and we’re rediscovering that these leaves pack some serious health benefits. They are a natural powerhouse. They’re not just a flavor booster; they’re a mood booster, a decongestant, and even a stress reliever. Let’s break down some of the best-known benefits of bay leaves, and I’ll sprinkle in some easy ways to use them.

  1. Relieves Anxiety and Stress

Feeling stressed or anxious? One natural way to calm your nerves is to burn a bay leaf.

How to Do It:

  • Take a dried bay leaf, place it in a fire-safe dish, and light one end. Let it burn for a few seconds before blowing it out. It will smolder like incense.
  • The scent released is soothing and has been said to help reduce anxiety and improve your mood. It’s like aromatherapy but with a more earthy, natural vibe.
  1. Helps Open Up Your Respiratory System

If you’ve got a stuffy nose or sinus congestion, bay leaves can come to the rescue. The essential oils released from bay leaves have antimicrobial properties and can help open up your airways.

How to Use It:

  • Boil a pot of water.
  • Add a few bay leaves.
  • Remove it from the heat, cover your head with a towel, and lean over the pot (carefully!) to inhale the steam for a few minutes.

It’s like a natural, DIY VapoRub session. Great for colds, allergies, or just when you feel stuffy and need some relief.

  1. Boosts Your Immune System

Bay leaves contain compounds like linalool and cineole that have anti-inflammatory and antioxidant properties. Translation? They can help give your immune system a little boost.

How to Use It:

  • Make a simple bay leaf tea. Steep 2-3 bay leaves in hot water for about 10 minutes. Add a little honey or lemon if you’d like.

This is an easy, daily way to get those benefits without much fuss. Plus, it’s a nice alternative to plain water when you want something warm and comforting.

  1. Improves Alertness and Focus

If you’re feeling sluggish, bay leaves can help sharpen your mind. Inhaling the scent of burning bay leaves is said to improve alertness and reduce mental fatigue.

Quick Tip:

  • Burn a bay leaf before starting your workday or when you need to focus on a project. It’s a natural pick-me-up that’s way better than that third cup of coffee!

5. Supports Digestive Health

Bay leaves have been used traditionally to aid digestion, reduce bloating, and calm upset stomachs.

How to Use It:

  • Add a bay leaf to your next pot of beans or lentils. It not only enhances the flavor but also helps reduce the gas that legumes tend to cause. And don’t forget to soak the beans for at least 8 hours. As my father used to say, “you’ve got to burp the beans baby.” No more post-dinner regrets!

6. Natural Insect Repellent

Who would have thought – bay leaves can help keep pests away too.

How to Use It:

  • Place dried bay leaves in your pantry or cupboards to repel bugs like ants and cockroaches.

Practical Tips for Using Bay Leaves in Everyday Life

  • Cooking: Add bay leaves to soups, stews, legumes, and sauces. Just remember to remove them before serving! Although they are safe to eat, they are tough and fibrous, making them hard to chew and digest.
  • Tea: Brew bay leaf tea for a calming, immune-boosting drink.
  • Burning: Use bay leaves for stress relief and mental clarity.
  • Inhalation: Steam with bay leaves to clear congestion.
  • Home Protection: Place bay leaves around your home to repel insects.

How to Grow Bay Leaves at Home

Bonus! You can grow your own bay leaves. The official plant name is Bay laurel.

  • Plant in a sunny spot: Bay laurel loves full sun, but it can tolerate some shade.
  • Use well-draining soil: Whether in a pot or the ground, make sure your soil doesn’t stay soggy.
  • Water moderately: Let the soil dry out a bit between waterings. Bay laurel prefers to be on the drier side.
  • Prune to shape: Bay laurel grows slowly, but regular pruning keeps it bushy and manageable.
  • Harvest wisely: Once your plant is established, you can pick fresh leaves as needed or dry them for later use.

So it’s simple to grow but slow. It takes 1-2 years to harvest. But bay laurel is a perennial plant, which means once it’s established, it keeps growing year after year — no need to replant. Just give it a sunny spot, well-draining soil, and a little pruning, and you’ll have fresh bay leaves to harvest for years to come.

If you try any of these remedies, let me know how they work for you! We’re all about learning and growing together here at GreenDesert.org.

We have an entire page of natural remedies. If you have natural remedies you choose, please share them — it takes a community!

Garden Health Household

Bacopa

Bacopa: The Ancient Herb for Brain Health

Overview

Bacopa monnieri, also known as Brahmi, is a perennial herb native to wetland areas and has been used in Ayurvedic medicine for centuries. Rich in bacosides and antioxidants, it is widely recognized for its cognitive-boosting properties (Livayur).

Medicinal Benefits

  1. Improves Cognitive Function: Bacopa enhances memory, learning, and information retention (Perfect Keto).
  2. Reduces Anxiety & Stress: Known for its adaptogenic properties, Bacopa helps regulate stress and cortisol levels (Healthy-Flakes).
  3. Protects Brain Health: Its antioxidants protect against oxidative stress, potentially aiding in neuroprotection (ivayur).

How to Use

  • Tea: Steep fresh or dried leaves in hot water for 5–10 minutes.
  • Capsules: Take 300–450 mg of standardized extract daily.
  • Tincture: Use 2–3 mL in water or juice.
  •  

How to Grow Bacopa

Since Bacopa seeds can be slow to germinate, starting with seedlings is ideal for most gardeners. Here’s how to grow it indoors:

1. Lighting: Place near a window with bright, indirect sunlight.
 
2. Watering: Keep the soil moist and fill the saucer under the pot with water for continuous hydration.
 
3. Humidity: Bacopa thrives in high humidity, so mist it regularly or use a humidifier.
 
4. Temperature: Keep between 65-85°F.
 
5. Fertilization: Use a balanced, water-soluble fertilizer every 4-6 weeks.
 
We got our seedlings at a local farmers market.  I’ve also seen them online!

Side Effects & Precautions

  • Possible side effects include nausea, fatigue, or upset stomach.
  • Pregnant or breastfeeding women should avoid Bacopa (Healthy-Flakes).

Did You Know?

Research suggests Bacopa could be beneficial for ADHD, Alzheimer’s, and lowering blood pressure.

We have an entire page of natural remedies. If you have natural remedies you choose, please share them — it takes a community!

DIY Garden Household sustainability Sustainable

How to beat inflation

6 ways to Beat Inflation with Regenerative Agriculture

How to beat inflation. It’s really about learning how to recycle your materials. We think with the end in mind. So from the waste of the things we buy, we make sure that we can utilize them in our gardens.  Our recycled materials are turned into fertilizers, microbes & soil, and from soil to produce. That savings in produce save us a lot of money over time.

The average American throws out about 5 pounds of waste per day. At least 32% of that is recyclable. That’s about a pound a day or 30 pounds per month…..and that’s where the gold is. Nature already knows how to recycle and rework those materials. So with nature’s assistance, this material is reworked to help go against inflation. As a bonus, It also helps reduce your environmental impact. So I’m going to discuss with you six ways we beat inflation with regenerative agriculture principles.

1. We compost our cooked food waste through a process called Bokashi. It’s a Japanese method of composting that uses a special type of bran to ferment food waste. After it ferments, you can bury it in your garden to become nutrient-rich soil. This process also creates a nutrient-rich liquid that we use as a fertilizer. Since we only buy and grow organic food, we get the benefit of being able to rework all of our food waste into our garden. Nothing we buy goes to waste.

2. Second, we compost all of our raw food waste. We have worm bins buried in our garden and add all of our raw food scraps to it. We also add leaves and yard waste to the compost bin to help with proper composting ratios. We even shred some of our paper waste and add it to the compost bin. Paper waste is a good source of carbon, which is necessary for the composting process. The worms and other insects break all this down within a few weeks, making it nutrient and microbial-rich and immediately ready for use in the garden. Composting like this is three times faster than traditional composting.

3. Third, we mulch tree clippings and put them back into the garden as compost. Mulch helps to keep the soil moist and suppress weeds. It also breaks down over time and adds nutrients to the soil. Three trees give us enough clippings to mulch our entire garden twice yearly. This replaces having to buy outside soil.

4. Fourth, we compost our orange peels, egg shells, and wood ash from the fireplace. These offer unique NPK ratios that help make specific soil and fertilizer arrangements. We are also able to add microbes from diverse sources like worms, chicken & fish waste, and bokashi.

5. Remember, we are in the desert; so we conserve our water. We collect rainwater and use greywater. Greywater is wastewater from sinks, showers, and baths. We reuse it to water our trees. We collect rainwater and use it to offset our drinking water cost, and it’s much healthier to bodies. Overall It’s a huge savings on water costs. 

6. Lastly, number six, we collect our own seeds. Reoccurring seed costs are a significant farm expense, but collecting your seeds helps nullify this cost. You also know precisely where your seeds come from.

Conlusion:

At this point, our garden is now producing enough biomass that we no longer have to buy soil or fertilizer.

We also don’t have to grocery shop as much. We get a third of our food from our garden.

The savings from each step in our journey fuels the next step.

This process continues to be repeated and be refined, and with that, our savings grow, and our lifestyle continues to ease, even in an inflated environment.

Over time, you will notice your trash bin shrinking. When you see this happening, you’ll be saving money and the environment. Once you buy the material, it becomes yours, and recycling your waste is like getting compound interest on your money. Some of the materials we put in our garden years ago still give back today.

Don’t be discouraged; we started this process with one plant. So, just one small step at a time is all you need. Check our our website for more infor graphics on the process.

Also Please check out our off-grid series to learn more about living a more self-sufficient, self-sustainable lifestyle. In this series, we show the building of a rainwater harvesting system, greywater system, and compost bin,  and much more all in one working system off-grid.

I hope you enjoyed this video! If you did, please give it a thumbs up, like and share it with those you think it will help, and subscribe for more tips on self-sufficient living. If you have any questions, or ideas we can all benefit prom please leave them in the comments below. Until the next time my friends, Eat Green Get Sun & Stay grounded.

Be sure to check out our page on natural remedies  and add some of those natural ingredients to your recipe.

DIY Garden Health Household sustainability Sustainable

Rosemary

Want to Keep Your Brain Sharp? Add This to Your Garden

Rosemary isn’t just a fragrant herb that adds flavor to your dishes; it’s a powerhouse of health benefits and may even be able to prevent your brain from aging.

A Little History

Rosemary’s botanical name is Rosmarinus officinalis, and it’s part of the mint family. Its name derives from the Latin words “ros” meaning dew, and “marinus” meaning sea – giving it the meaning of “dew of the sea.” Rosemary is native to the Mediterranean region and has been revered since ancient times by cultures like the Greeks, Romans, and Egyptians for its culinary and healing properties.

In ancient Greece, students wore rosemary garlands while studying, as it was believed to improve memory and concentration. The plant was considered sacred by the Romans, who used it for purification rituals and crowned newlyweds with rosemary wreaths as symbols of love and loyalty. Clearly, this herb has been valued throughout history!

Benefits of Rosemary:

So what’s so great about rosemary? Let me count the ways…

For starters, it’s packed with powerful antioxidants like vitamin E, vitamin C, and plant compounds called polyphenols. This helps neutralize free radicals and fight oxidative stress in the body, which plays a role in aging and many diseases. Some researchers even suggest rosemary may help prevent cancer and Alzheimer’s disease.

There’s credible research from respected sources like the National Institutes of Health (NIH), Alzheimer’s Drug Discovery Foundation, and Journal of Medicinal Food suggesting rosemary may have the ability to protect brain cells. That means regularly consuming rosemary through things like rosemary tea, seasonings, or extracts may be an effective way to take advantage of brain-boosting benefits, like keeping your brain healthy and helping preserve memory, learning, and overall cognitive function as we get older.

Rosemary is also an anti-inflammatory superhero thanks to its abundance of compounds like carnosic acid. This helps reduce inflammation throughout the body, providing relief for issues like muscle soreness, arthritis, and even asthma attacks. Speaking of muscles, rosemary has long been used to improve circulation – the increased blood flow can help muscles recover faster after a tough workout.

As if that’s not enough, rosemary has antimicrobial and antibacterial properties that make it a natural germ-fighter. Studies show it can inhibit the growth of certain strains of bacteria and fungi. Sipping some rosemary tea may just help that annoying sore throat!

The benefits truly go on and on, but I think you get the idea – rosemary is one mighty herb! Now for the fun part – how to get your hands on some.

How to Grow Rosemary at Home:

Your first option is to grow it yourself. Rosemary is incredibly easy to cultivate, even for those new to the garden. This evergreen perennial thrives in full sun and well-drained soil. Plant it once and it will just keep on giving year after year! Rosemary can also tolerate droughts quite well once established.

You can find rosemary plants at most nurseries in the spring. Or, you can easily start from seed or take cuttings from an existing plant to propagate new ones. Rosemary makes a fantastic addition to garden beds, containers, and even herb spirals.

Other Places to Find Rosemary:

If gardening isn’t your thing, you can find dried rosemary or even buy fresh rosemary plants at many grocery stores and farmers markets.

However you acquire it, I highly recommend having a fresh rosemary plant around. There’s just something so satisfying about being able to pluck sprigs right from your own plant to use in cooking or home remedies! Those intoxicating aromas alone are reason enough.

Simple Ways to Use Rosemary:

Now that I’ve convinced you to embrace rosemary, let’s talk about easy ways to use it:

  • Add sprigs to roasted veggies, soups, breads, marinades – the options are endless
  • Infuse olive oil with rosemary for dipping or drizzling
  • Make a refreshing rosemary lemonade or sun tea
  • Dry the leaves and use them in sachets, potpourri, or smudge sticks
  • Create salves, creams, or hair rinses by steeping the herb in oils/butters
  • Take advantage of its fumigant properties by burning bundles to purify air

The possibilities truly are limitless with this versatile plant!


We have an entire page of natural remedies.  Let us know if you have any of your own.

DIY Garden Health Household sustainability Sustainable

Bentonite clay

The Power of Bentonite Clay… Unleashed on our Family Land

Imagine stumbling upon a hidden gem on your own land. That’s exactly what happened to us on land that’s been in our family for more than 100 years…. in Texas.

As we were digging a pond, we stumbled upon an ample supply of bentonite clay.  We always knew it was present throughout the land.  But seeing it in abundance firsthand was truly eye-opening… especially considering the red clay has been cherished for centuries.

The history of bentonite clay stretches back through the ages, with various civilizations recognizing its remarkable properties. Ancient cultures such as the Egyptians, Greeks, and Native Americans harnessed its power for healing and purification purposes. This clay was considered a prized possession, revered for its ability to draw out impurities and promote overall well-being. Today, we feel incredibly fortunate to have this treasure right beneath our feet. It’s like a magic potion for our skin, hair, and overall well-being. So let’s dive deeper into its benefits, uses and I even include a unique recipe to revitalize your skin using bentonite clay.


Detoxification and Purification:

Let’s start with its detoxifying powers. Bentonite clay has an incredible ability to absorb toxins and impurities from our skin. When applied, it acts like a magnet, drawing out excess oil, dirt, and grime, leaving our skin feeling refreshed and revitalized. It’s like a mini spa treatment in the comfort of your own home!


Nourishing Skin Care:

Not only does bentonite clay detoxify, but it also nourishes our skin with essential minerals. Silica, calcium, magnesium, and potassium work together to give our skin a healthy and radiant glow. Think of it as nature’s own multivitamin for your skin!

Hair Rejuvenation:

But wait, there’s more! Bentonite clay isn’t just for our skin—it’s a hair superhero too. If you’ve been dealing with product buildup or an oily scalp, this clay can come to your rescue. It gently removes impurities, excess oil, and residue, bringing balance back to your scalp.


Enhance Your Garden:

Bentonite clay not only benefits us personally but also plays a role in helping the environment thrive. It promotes agriculture and minimizes the need for harmful chemicals. The clay’s water-retention properties help conserve water by soaking up excess moisture and preventing soil erosion. This means less water is wasted, and it helps conserve one of our most precious resources.

Additionally, it improves soil quality by enriching it with essential minerals and nutrients. Bentonite clay even detoxifies the soil, removing harmful substances, purifying it and creating a healthier ecosystem.


Here are some practical ways to incorporate bentonite clay into your routine:

Face Mask: ( I have a full recipe at the bottom of this blog)

Create a rejuvenating face mask by mixing bentonite clay with water or other natural ingredients like apple cider vinegar, rosewater, or aloe vera gel. Apply the mask to your face, leave it on for about 15-20 minutes, then rinse off with warm water. This helps to detoxify the skin, unclog pores, and absorb excess oil.

Hair Mask:

Revitalize your hair by making a nourishing hair mask with bentonite clay. Mix the clay with water, aloe vera gel, or your favorite hair conditioner to form a paste. Apply it to your hair, focusing on the roots and scalp, and let it sit for around 20-30 minutes. Rinse thoroughly to remove the mask and enjoy the benefits of increased volume, reduced oiliness, and improved scalp health.

Body Detox Bath:

Add bentonite clay to your bathwater to create a detoxifying bath. Mix a quarter to half a cup of clay into warm bathwater and soak for 20-30 minutes. The clay helps draw out toxins from your body, leaving you feeling refreshed and rejuvenated.

Spot Treatment:

For pesky blemishes or insect bites, make a paste using bentonite clay and water. Apply it directly to the affected area, let it dry, then rinse off. The clay’s absorbent properties can help soothe irritation and reduce redness.

Oral Rinse:

Bentonite clay can also be used for oral care. Mix a small amount of clay with water to create a liquid paste, then swish it around in your mouth for a couple of minutes before spitting it out. This can help freshen your breath and promote oral health.

** Remember, it’s essential to use high-quality, pure bentonite clay and follow the instructions provided. If you have sensitive skin or any underlying skin conditions, perform a patch test before applying bentonite clay to larger areas. As always, consult with a healthcare professional if you have any concerns or specific medical conditions.


DIY Bentonite Clay Face Mask:

To revitalize your skin, try this simple and effective face mask recipe:

Ingredients:

  • 1 tablespoon bentonite clay
  • 1 teaspoon apple cider vinegar
  • 1 teaspoon raw honey
  • 2-3 drops of your favorite essential oil (optional)

Instructions:

  • In a small bowl, combine bentonite clay, apple cider vinegar, and raw honey.
  • Mix well until you have a smooth, creamy consistency.
  • Add a few drops of essential oil for a delightful aroma and added benefits.
  • Apply the mask to clean skin, avoiding the eye area.
  • Leave it on for about 10-15 minutes, or until it dries.
  • Gently rinse off with warm water, followed by a moisturizer.


We have an entire page of even more natural remedies. If you have natural remedies you use, please share them — it takes a community!

DIY Health Household

Oats

Anxiety is something most of us experience at some point in our lives. While prescription medications are available, it’s important to explore natural remedies that can provide effective relief. Oats are one of those remedies that can support your emotional well-being while adding some deliciousness to your life!

Understanding Anxiety Disorders:

Before we delve into the remarkable benefits of oats, it’s important to understand the various types of anxiety disorders. These include anxiety disorder due to a medical condition, generalized anxiety disorder, panic disorder, selective mutism, separation anxiety disorder, social anxiety disorder, specific phobias, substance-induced anxiety disorder, and other specified/unspecified anxiety disorders. These conditions can significantly impact our daily lives, making even simple tasks seem overwhelming.  So if you’re experiencing any of these symptoms, you’re not alone, and there are solutions.

The Power of Nutritious Foods:

While anxiety can be challenging, making positive changes to our diet can help manage its symptoms. By selecting foods that promote emotional balance and support our overall well-being, we take a step towards a happier and calmer existence. Eating healthy is not just about nourishing our bodies; it’s about feeding our minds and souls too.

One incredible food that fits the bill perfectly is oats. Not only are oats affordable and easy to cook, but they also offer numerous benefits for anxiety relief. Let’s take a closer look at how oats can positively impact your emotional well-being:

  • Boosts Serotonin Levels: According to the Mayo Clinic, the carbohydrates found in oats help increase serotonin levels in our brains. Serotonin is a neurotransmitter that promotes feelings of calmness and relaxation, making it a powerful ally in the battle against anxiety.
  • Superfood Goodness: Oats are a true superfood! Packed with essential nutrients, they provide a wide range of health benefits beyond anxiety relief. Oats are an excellent source of dietary fiber, which aids in regulating blood sugar levels and promoting a healthy digestive system.

Creative Ways to Enjoy Oats:

Now that we understand the remarkable benefits of oats for anxiety, let’s explore some delightful recipes that incorporate this fantastic grain into your diet. The nice thing is that oats can be eaten raw or cooked.  Below are some recipes to consider that contain oats. I do my best to avoid adding sugar to my recipes.  If you need to sweeten things up, consider alternatives like fresh or dried fruit (watch your portions with dried fruit because they are concentrated in natural sugars).  Honey or agave nectar will also do the trick, but again use it in moderation since they still contain sugars. Stevia and Monk Fruit can also be great options, as well as unsweetened nut butter.

Some recipes to consider:

  • Oatmeal Cookies – Indulge your sweet tooth while enjoying the anxiety-reducing properties of oats. Remember, avoid as many processed ingredients as feasible.
  • Oatmeal Fruit Bowls – Start your mornings off right with a nutritious and refreshing bowl of oatmeal combined with your favorite fruits.
  • Traditional Cooked Oatmeal – Experiment with different toppings like berries, nuts, or a drizzle of honey to add a touch of excitement to your breakfast routine.
  • Home-made granola – Create your own homemade granola using oats as a base. Combine them with your favorite nuts, dried fruits, and a touch of sweetness, then bake to golden perfection. Enjoy it as a snack or sprinkle it over yogurt for a delightful crunch.
  • Oats in Cereal: Elevate your cereal game by using oats as a base or mixing them with your favorite low-sugar cereals. Look for whole grain, low-sugar options such as bran flakes or unsweetened puffed cereals. You can add a sprinkle of cinnamon, a handful of nuts or seeds, and fresh fruits to enhance the flavor and nutritional value without relying on added sugars.

Here is my dairy-free recipe for overnight oats:

Ingredients:

1 cup oats- old fashioned oats work best

I cup milk- any milk works for this recipe (I like coconut milk)

I tbsp chia seeds- Optional 

2 tbsp yogurt of your choice (I enjoy almond milk yogurt)

1 tbsp honey or sweetener if desired

1 tbsp nuts of choice- (I enjoy almonds and pecans)-Optional

1/2 tbsp coconut flakes- Optional

1/3 cup fresh fruit

Instructions:

Combine all dry ingredients 

Add milk and yogurt then stir to mix

Add sweetener 

Add fruit on top (do not mix in until ready to eat)

Cover and refrigerate overnight. 

We have an entire page of even more natural remedies. If you have natural remedies you use, please share them — it takes a community!

DIY Health Household

Turmeric Milk

Sip, Sleep, Soothe: The Magical Powers of Turmeric Milk

 **********************************

I want to share an incredible discovery I made recently when battling a stubborn head cold. It involved a simple, yet mighty potion called turmeric milk. Trust me, it’s a game-changer!

Picture this: I’m feeling under the weather, my head feels like it’s about to explode, my nose is constantly running and my throat is on fire. Desperate for relief, a friend suggests trying turmeric milk. I’m intrigued, so I dive into some online research, gather a few ingredients, and put my own spin on a recipe. 

Before I give you the recipe, let’s talk about the superpowers of turmeric. This golden spice has been used for centuries in Ayurvedic medicine and is known for its anti-inflammatory and antioxidant properties. It’s like a superhero for your immune system! But here’s the catch: turmeric is not easily absorbed by our bodies. That’s where the pepper and coconut oil come in. They team up to make sure those beneficial compounds make their way into your bloodstream.

So, I whipped up a steaming mug of turmeric milk using almond milk, a pinch of pepper, a drizzle of coconut oil, a dash of cinnamon, a spoonful of honey, and a generous sprinkle of turmeric. Let me tell you, it was a delightful surprise for both my taste buds and my health!

Not only was it yummy and soothing, but it worked wonders overnight. I slept soundly, my throat felt instantly relieved, and when I woke up in the morning, I was already feeling at least 60% better. Coincidence? I think not! Sure, my immune system was doing its thing, but I firmly believe that turmeric milk gave it a powerful boost.

Now, I can’t promise that turmeric milk will cure all your ailments, but I can vouch for its potent healing properties. It’s like a warm, comforting hug for your body and soul. Plus, with its anti-inflammatory benefits, it’s a fantastic addition to any wellness routine.

Ready to give it a try? Here’s my simple and delicious recipe:

Ingredients: (1 serving)

• 1 cup of almond milk (or any plant-based milk you prefer)

• 1 teaspoon of ground turmeric

• A tiny pinch of black pepper (to unlock turmeric’s superpowers)

• 1 teaspoon of coconut oil

• 1/2 teaspoon of ground cinnamon

• 1 tablespoon of honey (adjust to your taste buds’ liking)

Instructions:

·         In a small saucepan, gently heat the almond milk over low to medium heat.

·          Add turmeric, black pepper, coconut oil, and cinnamon to the warm milk.

·         Whisk everything together until well combined and heated through, about 10 minutes.

·         Pour into your favorite mug, and sweeten with honey to taste.

·         Sip slowly, and let the soothing magic unfold!

Feel free to experiment and adjust the ingredients according to your preferences.

So, the next time you’re feeling a bit under the weather or simply want a comforting and nourishing beverage, give turmeric milk a try. It’s like a little cup of sunshine that may just brighten your day and boost your well-being.

Remember, our journey to a healthier, happier life is all about discovering natural remedies and sharing them with our loved ones. So go ahead, brew up a batch of turmeric milk, and let me know how it works its magic for you!

Don’t forget to share this blog with your friends and loved ones who could use a little natural healing too. 


We have an entire page of natural remedies. If you have natural remedies you choose, please share them — it takes a community!

Garden Health Household

Sage

Discover the Healing Power of Sage: From Hot Flashes to Cold Sores


When you think of sage you may think of burning it in your house to help get rid of bad energy, or using the herb for its yummy flavor in your favorite recipes.  But there is so much more to this small plant than you may think.

One of the more common varieties of sage, Salvia officinalis — also known as common sage, has been used for centuries in traditional medicine because it’s loaded with vitamins, nutrients and antioxidants… all known for protecting our bodies against disease.

And there are several ways to get the benefits… whether it be dried, or taken internally as a liquid, capsule, spray, tea, as a topical, or even cooked.

This blog shows you why you want to use sage and how to use it safely.


Antioxidants

Sage is rich in antioxidants and anti-inflammatory properties so that in itself makes sage a powerhouse. Antioxidants work by neutralizing free radicals (unstable molecules that can damage your cells and contribute to development of chronic diseases).  So if antioxidants are neutralizing those free radicals, naturally it helps prevent them from causing harm to the body. Some of the specific antioxidants found in sage:

  • Rosmarinic and ellagic acids — known for their anti-inflammatory, anti-viral and antibacterial properties
  • Quercetin and Flavonoids — shown to reduce inflammation, protect against heart disease, cancer and improve brain function


Colds, coughs and other respiratory issues

Sage has antibacterial, astringent, and antiseptic properties! This can help soothe that sore throat and that nasty cough from your lungs.  Sage will help with inflammation in turn making that annoying common cold feel better faster.


To use sage for a cough, make a tea!  Steep 1-2 teaspoons of dried sage leaves in a cup of hot water for 5-10 minutes.  Try drinking 1-2 cups per day to help alleviate symptoms.

You can also add a few fresh or dried sage leaves to a pot of hot water.  Inhale the steam to help clear congestion.


Oral Health

The antimicrobial effects also can help prevent cavities in your mouth because it can kill the bacteria that causes dental plaque and gum diesease.  The astringent properties in sage may help tighten the gums and reduce inflammation.

You’ll find several recipes online to make a mouthwash using sage:

  • Bring a cup of water to a boil
  • Add 1-2 teaspoons of dried sage leaves to the pot and let them steep for 5 – 10 minutes
  • Strain the sage leaves out of the water, allow it to cool
  • Transfer your sage mouthwash to a container and store in the fridge til you’re ready to swish.


Menopause

Sage has been used traditionally to help alleviate menopause symptoms, such as hot flashes, night sweats, dryness and irritability.

It is thought that some compounds in sage have certain estrogen-like properties that can trick your body.

To use sage for menopause symptoms, make a tea just as you would for a cough!  Steep 1-2 teaspoons of dried sage leaves in a cup of hot water for 5-10 minutes.  Try drinking 1-2 cups per day to help alleviate symptoms.

Another option to reduce hot flashes is to add a few fresh or dried sage leaves to a pot of hot water and inhaling the steam.


Cold Sore

Because of the antiviral and antimicrobial properties found in sage, the herb can help reduce inflammation and kill the virus that causes cold sores.


To use sage for cold sores, make tea!  But this time you’re not drinking it.  Once the tea has cooled, use a cotton swab to apply the tea to the affected area.

Another option is to mix a few drops of sage essential oil with a carrier oil and apply it to the affected area.  I’ve read that adding rhubarb to the mix tends to work better.


There are tons of other ways to reap the benefits of sage including making tinctures and it’s also available in capsule form.  We can’t forget cooking with it.  It is generally believed that the medicinal benefits of sage are retained when it’s cooked, one reason why it’s been used fresh and dried in a variety of dishes for centuries.   

But keep in mind, the concentration of beneficial compounds in sage may vary depending on how it is prepared and consumed.  For example, sage tea is likely to have a higher concentration of beneficial compounds that sage that is cooked and consumed as part of a dish.


You can grow it!

Another benefit, it’s relatively easy for you to grow your own! It’s a hardy perennial plant that is native to the Mediterranean region, but it can be grown in other parts of the world too, including right here in Phoenix.  The plant likes a sunny location with well-draining soil.  And they don’t need much space so you can even plant them in pots and use them fresh or dry.


If you decide to grow a plant, let us know and send photos.

We have an entire page of natural remedies. If you have natural remedies you choose, please share them — it takes a community!