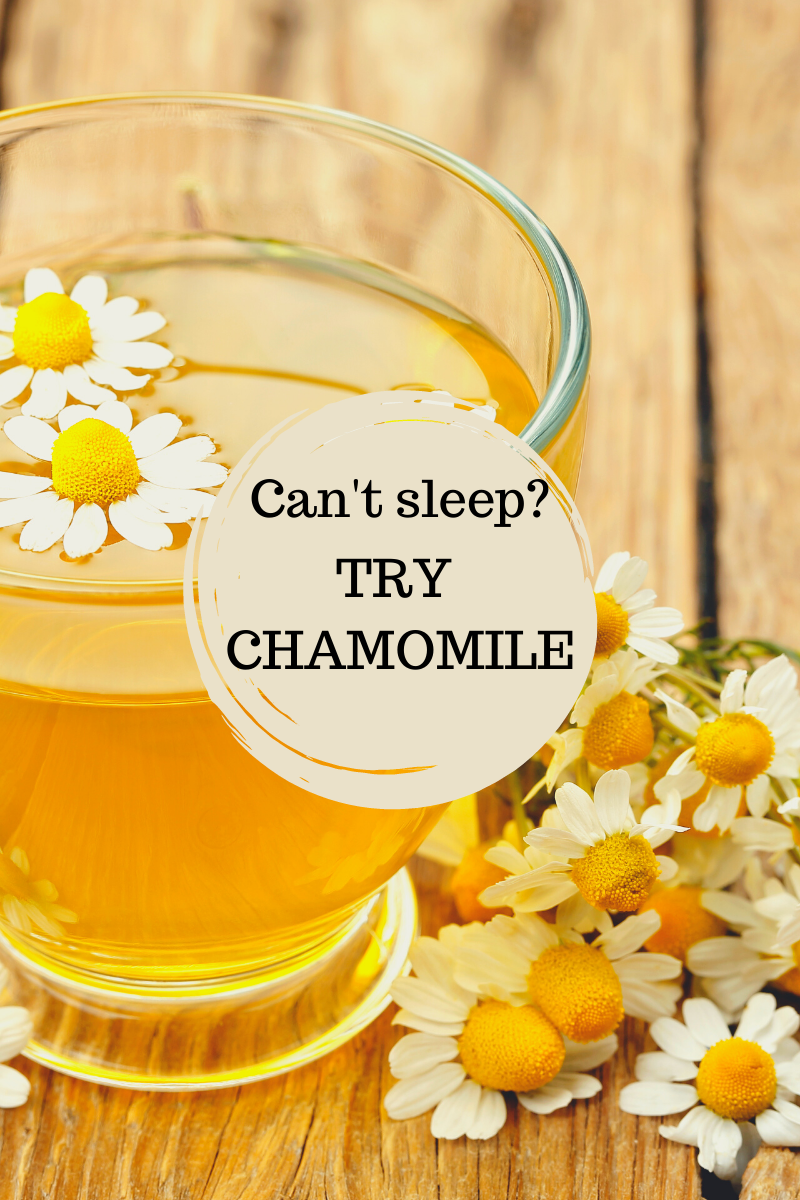
Garden Health

BLACK EYED PEAS

How to Grow Black-Eyed Cowpeas

Black-Eyed Cowpeas, also known as a “Southern Field Pea” or “Crowder Pea are one of my favorite legumes to grow because you get sooooo many and there are multiple ways to eat them.

One way is to let the beans dry and cook them… your traditional black-eyed peas.   For this method it’ll take anywhere between 80 – 100 days til harvesting time… and you have options; You can let the pods stay on the plant until they are brown and dry, or you can pull the plants and hang them to dry.  Either way, I usually leave a few plants in the garden beds to dry so that I have an abundance of seeds for planting and sharing.

If you choose to dry them for cooking that traditional black-eyed peas dish, you will simply remove the beans from the pods (shell them), and you’re ready!  I don’t do anything special with cleaning… but I do soak all of my beans for at least 6 hours before cooking them.

 You can also pick the pods while they are green, like a snap pea,  as soon as they are well-filled out with seeds, about 70 days after planting.  For this method, I chop the pods and add onions, bell peppers and whatever else I have in the garden.  So you can really get creative.

The pods are 6″ to 8″ long  and can have up to 15 peas on each one.  That’s a lot of beans! And the vines are resistant to wilt and nematodes. They are cream or tannish-colored with a small black spot. They love heat and are a great source of fiber and protein.

So how do you plant them?

I plant my seeds directly into my garden beds with lots of compost.  But many experts suggest you first soak the seeds for up to 12 hours.  The idea is that since the seeds like a lot of moisture in order to germinate, this will speed up the process because they will already be soft and moist. Then plant them directly in the soil, after your last chance of frost (ideally above 70 degrees.  You don’t need to plant them deep, about an inch into the soil.  They are heavy yielders, so give them some space.  I plant the seeds about three inches apart and I space the rows about two feet apart.   Also it’s best to give them some support, like trellises.  It helps keep the plants off the ground, which gives them more circulation and it should minimize disease.  It also makes it easier to harvest.

As for when you will see your babies popping out of the soil… My experience has been within a week, but other gardeners say 7-14 days.  So be patient.

20+ seeds for $5

All of our seeds are GMO-FREE, open-pollinated and untreated.

Garden Health

Shishito Peppers

Shishito Peppers – Why all the hype?

Some of my favorite things in the GreenDesert garden are shishito peppers!  I tasted them years ago in a restaurant and I was hooked! They were blistered, had a sweet and smoky flavor and were snack sized, making it too easy to eatJ I had to have more!  The problem was I couldn’t find them in most restaurants or even grocery stores.  So of course I had to grow them… for so many reasons.

But before I share how easy they are to grow, let’s talk about what all the hype is about.

Shishito pepperes are a Japanese heirloom pepper variety.  I can’t write enough about how addicting they are, and extremely easy to make.  But if you eat enough of them, you’re bound to run across a hot one.  The rule of thumb is one in every ten of the peppers will be spicy… except if you eat them with me; For some reason I seem to get all of the hot ones while my family enjoy the rest, and I am still addicted to the peppers!  It’s not like you can look at them to tell which are spicy.  And although some people say the spice isn’t really hot, that has not been my experience, so be prepared.  The hot peppers that I experienced have been really hot, hot enough to make my nose run and my eyes burn.  Granted, I am not a huge fan of spicy… so perhaps my extreme spice is mild to others.  But again, in general, they are not hot. It’s like a sweet, smoky bell pepper.


HOW TO EAT THEM

And you can eat them so many ways.  I add them diced and raw to my salads, eggs, even sandwiches.  But they can be one of your simplest, healthy snacks to make.  You really don’t need much prep because you can eat the entire pepper — seeds, stems and all.  I like to coat them in avocado or olive oil, throw them in a pan, and let them brown and blister.  Sprinkle with a little salt and you’re done.  I often add a little lemon and/or some red wine vinegar to spice it up.  Or even stir-fry it with other veggies from the garden, like onions, garlic and bell peppers.

Obviously it was the flavor that first got my attention; it helps that the heirloom peppers have lots of health benefits including being high in vitamins A and C, fiber, potassium and folic acid.  They’re also loaded with antioxidants, among other benefits!


HOW TO GROW SHISHITO PEPPERS

  • First you want to choose a place in your garden that gets full sun for about 6 – 8 hours per day. You can grow shishito peppers directly in soil, pots or raised beds.
  • I’ve been successful planting our shishito peppers directly into my garden beds. But most experts suggest you start the seeds indoor 6 to 8 weeks before you transplant them to the garden.  Keep in mind, the seeds will germinate faster in warm soil so you can use a heat mat, put them on top of your fridge or whatever method you use to keep the soil warm.
  • Once the seeds have sprouted, which can take as little as a few days, you’ll want to move them to a sunny spot… but not yet outdoors. So you can use a windowsill that gets some sun, use grow lights, or again, whatever creative methods you choose.
  • Keep the soil moist, but not soaked.
  • Next, about a week before transplanting, you’re going to want to harden your plants, to get them ready for their new outdoor home. To harden them, just set them outside for a few hours per day.  Basically it gives the plants stress-free transition.
  • After about a week of hardening, your plants are ready for their big move! Remember, choose a spot that gets 6 to 8 hours of full sun per day.
  • As for harvesting, it varies. Usually they are harvested while they’re still green.  But you can leave them on the plant until they turn red too.  Either way, don’t ignore the abundance of peppers!  The more you pick, the more the plant will keep producing.  If you neglect her and the plant gets overloaded with peppers, that tells the plant to stop producing.

NEED SEEDS? We sell shishito pepper seeds, along with other medicinal sees on our Etsy site

Don’t forget, whatever ailment you have, I’m sure there are several natural remedies that can help!  We have an entire section of natural remedies on our page.


Health

ARMENIAN CUCUMBER: MORE THAN A FRUIT

WHY ARMENIAN CUCUMBERS ARE UNDER-RATED

 There are so many types of cucumbers…  everything from English, Persian, lemon and one of my favorites – Armenian cucumbers. They’re also known as yard-long melons, which makes sense when looking at its appearance.

The fruit grows up to 36 inches… but it’s most flavorful at about 15 inches.  The inside of the cucumber resembles more of a cantaloupe than a cucumber.  And not only are they crisp and refreshing, they are great hydrators.  In fact I think they are under rated for their health benefits. 

 Since they consist mostly of water and electrolytes, they can relieve dehydration, which is also great at helping prevent constipation.  The high water content is also a bonus if you’re trying to lose weight… along with its low calories.

One of the things we do on hikes is we pack hydrating fruits and veggies… like cucumbers and oranges.  We snack on them throughout the hike, with small sips of water.  This hydrates our bodies and keeps me from having to go to the bathroom more often from drinking so much water.

Did you know that some people get as much as 40% of their total water intake from food.

I use Armenian cucumbers for my pickles and relish.  I add them to sandwiches, wraps, salads, water or just snack on them raw.  There are so many ways to enjoy any type of cucumber, but Armenian cucumbers are still one of my preferences.

They are refreshing and have so many health benefits including being high in antioxidants, a range of B vitamins, along with vitamins A and K.  And don’t toss the peel, eat it all because that’s where you’ll get your maximum nutrients… benefits that also extend to your skin.  Remember when I mentioned the high water content in cucumbers? That makes it great for reducing skin irritations and helping with aging.  The old sliced cucumber over your puffy eyes work for a reason. The high water content hydrates the skin around your eyes while the antioxidants and flavonoids in the cucumbers reduce swelling and soothes inflammation in the eye area.

All you have to do is slice two pieces of  a cool cucumber from the fridge.  Close your eyes and place the slices on them for about 15 minutes.  Then just pat your eyes dry when you’re done.  Try this routine morning and night and watch the puffiness melt away.

According to the USDA, one 142-g cup of unpeeled, raw, chopped cucumber contains the following nutrients:

  • water: 137 g
  • calories: 17 
  • protein: 0.8 g
  • fat: 0.2 g
  • carbohydrate: 3.1 g, including 2.0 g of sugar
  • fiber: 1.0 g
  • calcium: 19.9 g
  • iron: 0.3 mg
  • magnesium: 17 mg
  • phosphorus: 29.8 mg
  • potassium: 193 mg
  • sodium: 2.8 mg
  • vitamin C: 4.5 mg
  • folate: 19.9 mcg
  • beta carotene: 44 mcg
  • lutein + zeaxanthin 22.7 mcg
  • vitamin K: 10.2 mcg

Unfortunately you don’t often see Armenian cucumbers at local grocery stores.  You’re more likely to find them in farmers markets.  Another option — GROW THEM!  They’re pretty easy to grow.  In fact they thrive in hot summers, great for us in Phoenix.  The high temperatures do not stress them.

We sell our seeds in our Etsy shop

All of our seeds are NON-GMO, untreated and open-pollinated.

HOW TO GROW:

The two main ingredients for a high yield of Armenian cucumbers are hot days and lots of water.

The best time to plant is after the last chance of frost. The ideal temperature range for germinating the seeds is between 65 and 90 degrees.  The warmer temps will yield faster sprouts, in as little as three days.

Once the temperature is right, decide how many plants you can handle.  They love to vine and can easily take over a garden… and you can continue planting through the heat.  Just a few plants will give you almost more than you can handle.

Now it’s time to plant!  I make a hole with my finger about a half inch deep, with about a foot in between each plant.  Then I place two to three seeds in each hole.  Next I sprinkle soil to fill the holes and cover the area.  Then I water the area with a light shower immediately.

Remember, try not to overcrowd the plants because that makes them more susceptible to pests and diseases.

It’s best to pick the plants once they’re about a foot and a half.  Although they can grow over three feet long, and are still fine to eat, they don’t taste as good.  Also, leaving the fruit on the vine for long periods tells the plant it no longer needs to produce, so you will slow down your production.

Finally, when you’re harvesting your fruit, I like to cut it from the vine versus pulling it, to make sure I don’t damage the whole vine.

More benefits and other natural remedies at GreenDesert.org.

Health

Egyptian spinach

I am so excited to introduce you to molokhiya, also known as Jew’s mallow, jute mallow, and Egyptian spinach… among other titles depending on what part of the world you’re in.

It isn’t your typical spinach.  It originated in Egypt but has since spread all over the world.

And for good reason; Egyptian spinach has a powerhouse of nutrients that can benefit your whole body.

It’s touted to have more Vitamin E, C, potassium, iron and fiber than any other vegetable!

More benefits… it has nine times more calcium than spinach, nearly five times more carotene,  B1 and B2 than spinach.

According to the International Journal of Research, Egyptian spinach has more than 30 vitamins and minerals.

So what does this mean?

It’s an excellent food to boost your immune system; it’s known to regulate digestion, help fight acne, help build strong bones, improve circulation, protect heart health, and reduce inflammation. The magnesium in Egyptian spinach is supposed to even help you sleep.

And you can do so much with it.

I add it to my salads, beans, stews, even tea.  In fact, many people use it in their soups because when you boil it, it makes sort of a broth. And making a tea is supposed to help reduce pain for things like arthritis, headaches and belly aches because of its anti-inflammatory properties.

You can enjoy the benefits of the leaves raw or cooked.


Fun Legends:

It’s said that Cleopatra saw the soup as her secret for maintaining her youthful appearance.  Legends say she used to eat a soup of the leaves daily.

It’s also said that consuming the vegetable was once limited only to pharaohs.


NOT ANYMORE!


In fact, not only are there no restrictions to how much you can buy; you can plant it yourself!

And one thing I love about planting it is that it likes the heat.  It’s one of the few green vegetables that thrive in the Arizona summers.

So that means if I’m growing outdoors, I can enjoy my regular spinach in the winter, and my Egyptian spinach in the summer.


HOW TO PLANT

Egyptian spinach is fairly easy to plant, even here in the desert.

It’s so easy that we planted it once and it comes back every year, all over my yard.

So I save the seeds and offer them on our Etsy site


If you’re planting outdoors, you’ll want to plant in the spring, after all chance of frost has passed.

I plant the seeds about ¼ inch deep and about two inches apart.  The seeds are so small that I just draw a line in the soil, drop the seeds and sprinkle soil on top.  So that tells you, you don’t need to bury the seeds deep.  When deciding how close to plant, keep in mind that the plants tend to grow outward, like a shrub. 


The plants prefer full sun, and well-draining soil.

I love using ollas for all of my plants because it allows the plants to take the exact amount of water they need, so you don’t have to worry about over or under watering.  Plus we use rainwater in our ollas.

When the temperatures reach 100 degrees in the summer, we often turn on the sprinklers to water once per day for 20 minutes.


If you plant Egyptian spinach, we’d love to see the progress.  And of course if you have recipes, send those our way as well.


Don’t forget, we have natural remedies for everything from heart health, indigestion, acne, blood pressure – the list goes on.

Health

Frankincense

What you didn’t know about Frankincense

When many people first think of the word “frankincense,” they might think of its reference in the Biblical tale. For thousands of years, frankincense has been regarded as a healing fragrance that promotes peace and meditation. Now, more recent studies about frankincense may back this claim! It’s part of the reason its earned the reputation as the “king of oils.”

So, let’s break it down. Frankincense is an aromatic resin (or dried sap) that comes from the trunk of the Boswellia tree that grows in dry regions of the Middle East, India, and Africa. Frankincense has been used in Ayurvedic medicine, which is an alternative medicinal system that began in India. The smell of frankincense is what might be most distinctive. It has a very spicy, sweet, woody fragrance to it which is why it typically comes in an oil form so that it can be diffused. Frankincense can be taken as a supplement, inhaled, absorbed into the skin, and infused into tea. Frankincense essential oil is recommended by most… and for good reason!

For people, a notable benefit is that it can help ease anxiety and stress. Frankincense has been shown to improve breathing and have a calming effect on the respiratory system. Some research suggests that there are compounds that can prevent leukotriene production, which is what causes bronchial muscles to constrict and therefore making it harder to breathe. The aroma of frankincense relaxes the diaphragm, encouraging slower, more controlled breaths. This ultimately helps ease stress and anxiety, and prevent the onset of panic attacks. Frankincense is commonly used in aromatherapy for this reason.

Frankincense is also claimed to be anti-inflammatory. Research did show that boswellic acid, an active compound in frankincense, reduced inflammation in patients with arthritis and osteoarthritis. The boswellic acids may also help prevent cancer from spreading and help with toothaches and bad breath. It’s also been known to reduce inflammation in the gut. Even more, rejuvenating damaged skin… which means its great for wound healing.

This next thing I read excited me… frankincense can be used for pets! Yes, really! Frankincense oil is safe for pets – dogs, cats, horses, cattle, etc. – when used in moderation. Frankincense can be used in animals for wound care, behavioral improvement, and easing anxiety. The same benefits that it has for humans, it has for animals. However, frankincense should be heavily diluted if you’re giving it to your pet. And it’s still best to check with your veterinarian first to make sure it’s safe for use on your animal!

After hearing this, you know how had to get in the kitchen. Our family at SoFreshSmells, came over and we got to work… excited to try out frankincense on our pets.  We made a Pet Anti-Anxiety Spray and was amazed at how quickly it worked.

We brought the dogs in the house during our storm and of course they were all over the place, anxious and loud.  We sprayed the Spritz in their beds and the back of their necks and we literally had to check on them… because they were so quiet and calm.  So I’m a believer!

How to use frankincense essential oil:

For humans – You can put 3-4 drops of frankincense essential oil in a diffuser and then inhale the aroma.You can also mix it with lavender essential oil for even more relaxation. To directly ingest it, dilute 1 drop of frankincense oil in 4 fl oz of liquid. For topical use, apply 1-2 drops to the skin in your desired area along with a carrier oil, like grape seed oil, and then massage into the skin.

For pets – As animals have a much stronger sense of smell than humans, only put 1-2 drops of frankincense essential oil in the diffuser for them to breathe, and pay attention to make sure they don’t negatively react to the smell. For oral use, use 1-2 drops of the oil diluted in your pet’s water bowl or in their food. For topical use, only use 1-2 drops of oil diluted in a carrier oil so as not to irritate your pet’s skin.

Here is a scale from essentialoilvet.com:

“For horses and cattle, apply 4-6 drops along the spine from tail to head, topically directly over the area of concern, or you can give 2 drops twice daily with feed to give internally. This is helpful over the poll of these animals as well.

For dogs, dilute 1 drop in 20-50 drops of carrier oil and give one diluted drop internally mixed with food, or apply topically along the spine or directly over the area of concern or between the paw pads of the back feet.

For cats, water diffusion is preferred, if applied topically dilute 1 drop per 100 drops of carrier oil prior to applying to the area of concern or by petting along the spine.

Frankincense is safe to diffuse around reptiles and small mammals as well.”

Below are most effective dosages, according to The National Institutes of Health

  • Asthma: 300–400 mg, three times per day
  • Crohn’s disease: 1,200 mg, three times per day
  • Osteoarthritis: 200 mg, three times per day
  • Rheumatoid arthritis: 200–400 mg, three times per day
  • Ulcerative colitis: 350–400 mg, three times per day
  • Gingivitis: 100–200 mg, three times per day

Let us know if you’ve ever tried frankincense!

We have an entire page of other natural remedies here. 

Health

Lemon

I am positive you and lemon have already met but allow me to reacquaint you.


Squeezed over anything and into anything, lemon does not disappoint in adding that

sour sweetness into our lives. And your taste buds do not fool you so let’s take a look at everything besides flavor that it nourishes our life with.

One average lemon provides about 30 mg of vitamin C, that’s about half of what’s recommended we take daily.

Keep in mind, some of that Vitamin C is stored in the lemon peel… about 7 grams, so don’t toss that goodness.


Our ancestors knew its benefits, in fact for centuries, sailors took lemons on long voyages to help treat and prevent scurvy.

Scurvy is a condition that killed millions of explorers, due to a Vitamin C deficiency.


That shows you how vital Vitamin C is for our health! It plays a huge role in the formation of collagen, the support system of the skin. It is an antioxidant and also helps maintain our skin, bones and blood vessels.


So lemons give you all of those benefits and more! They are also an excellent source of flavonoids, which are antioxidants.


The whole fruit, from peel to pulp, is good for you!


Unlike many fruits, lemons do not ripen or improve in quality after picking.

So the best time to harvest is when they are ripe and you’ll want to store them at room temperature away from direct sunlight.


In high enough quantities, the various nutrients in lemon are known to produce even more health benefits including:


1. Support Heart Health

2. Help Control Weight

3. Prevent Kidney Stones

4. Protect against anemia

5. Reduce cancer risk

6. Improve Digestive Health


I add lemon to my food, tea, water… you name it!

How do you use lemons? I’d love some yummy recipes! Email me.  


We have an entire page of natural remedies to help with whatever ailments you’re experiencing, everything from gas, to sore throats, allergies, even weight loss.


Health

Elderberry

The Truth About Elderberry


Elderberry has been gaining popularity recently with claims that it helps fight COVID-19, is a potent cold and flu remedy, and can help reduce upper respiratory irritation. You may have seen more elderberry supplements at the grocery store or even cough syrups with elderberry added as an ingredient. I am intrigued by all of the claims that this berry has so many benefits and I wanted to find out more!


First things first: Elderberry’s scientific name is sambucus and is the product of the European elder tree, which grows in warm areas of Europe, Northern Africa, Asia, and North America (that’s us!). Elderberries are very dark purple – almost black – in color and are edible. The use of medicinal elderberry dates back thousands of years and is still used today by so many people who say it is the best remedy for the cold and flu season.


The most common use of elderberry is for helping treat symptoms like congestion, cough, and fatigue that accompany the cold and flu. The reasoning behind this is that elderberries contain hemagglutinin protein which has been shown to limit a virus’s capability to replicate in the body, making you feel better more quickly because production of those icky germs making you sick are slowed, if not stopped. A study performed by Norweigan pharmacists and doctors showed that patients with flu-like symptoms who were given elderberry syrup had relief of their symptoms 4 days earlier than those who were given the placebo! Next time you feel like you may be coming down with the cold or flu, try taking some elderberry syrup right away and you may notice your symptoms are much more manageable!


Another claim that has been circulating is that elderberry is an effective remedy for COVID-19.     I hate to be the bearer of bad news, but the National Institutes of Health officially says not to rely on elderberry for prevention or treatment of COVID-19. However, while elderberry may not be the magic “cure” for COVID-19, its antiviral properties may help curb symptoms. But, there is not yet much research to support a definitive answer on if elderberry really does help fight COVID-19.


Yep, there’s still more! Some people with asthma or who experience frequent airway irritation have said that elderberry relieves their symptoms. Elderberry syrups are antioxidant rich and can actually reduce inflammation in the airways, and improve lung function when experiencing allergies. 


If you’re like me, you’re probably now wondering how you can get your hands on some of this! It appears that the best and safest way to consume elderberries is in syrup form. Some people say they have experienced nausea or vomiting by eating the whole, fresh or dried berries due to the raw seeds. You can make your own elderberry syrup at home or buy it from most health food stores. It is recommended to take ½ to 1 tablespoon of syrup once a day for mild symptoms, or this same dosage every 2-3 hours for more severe symptoms.


If you’ve ever used elderberry as a remedy please email us and let us know if it worked for you!


And if you’re having any other unpleasant symptoms, check our natural remedies page for some relief. 

Health

MORINGA: THE MIRACLE TREE

When many of us think of gardens, most don’t consider planting things for medicinal purposes. But it’s something you definitely want to keep in mind when planting your home garden because a medicinal herb garden can help you treat a variety of illnesses and you never know when you might need them!

If you only have room for one, my choice is the Moringa tree.  It’s technical name… Moringa oleifera.

The Moringa tree is probably one of the most important all around medicinal trees.  Some call it a miracle tree because it pretty much helps heal whatever ailments you need to treat.  The benefits are endless… It’s known to improve the immune system, nourish the brain and eyes, lower the appearance of wrinkles, promote energy, act as an antioxidant, among so many other benefits.

According to Moringa Farms, “Gram for gram, Moringa can have three times the potassium you would find in a banana, four times the vitamin A found in a carrot, and seven times the vitamin C found in an orange. Moringa is also rich in minerals, vitamins, essential amino acids, phytochemicals, vegetable proteins, anti-oxidants, anti-inflammatory agents, and carbohydrates.” 

Think about what that means… seven times more Vitamin C than oranges?  So naturally moringa is a great immune booster.  Vitamin C alone is known to help protect against immune deficiencies, helps with colds and flu, aids in wound healing and is great for heart health. Add the huge amount of Vitamin A and you have even more benefits including supporting bone health, maintaining healthy vision, it even helps reduce the risk of acne and reproductive health in men and women. The benefits are truly ongoing!

It’s hard to believe the seeds are supposed to contain genetic information to prevent more than 300 diseases.

That’s hundreds of reasons I use the leaves daily, whether it be in a tea or the leaves being sprinkled throughout my meals. There is so much you can do with moringa leaves… eat them raw or cooked.  You can even dry the leaves to use year-round. I even dry my leaves for moringa powder!

You can find teas and dried leaves online.  

You can also enjoy the benefits by growing your own!!

It’s one of the most resilient trees we own in Phoenix… where the temperatures reach up to 120 degrees.  

When we first planted our first moringa tree, about 11 years ago, it was in a place where it got beat up consistently with my kids basketballs.  But every time we thought it lost its battle, it came back.  Now it’s a huge tree in our garden and it’s definitely fertile.  We have volunteer trees throughout our yard and our neighbor’s yard.

So if you’re thinking of planting a moringa tree, here are a few things to consider:

  • Moringa does not like the cold and loses it leaves in colder climates, when the average temperature drops below 70 degrees.  This doesn’t mean it isn’t feasible to grow in cold climates.  Some people use pots and bring them in when the temperature is too cold; Since they’re subtropical trees, they grow best in warmer climates, USDA zones 8-10. Other than liking warm conditions, it’s not very picky and is pretty easy to grow.
  • Moringa is a resilient tree. It can survive drought conditions.  One of my moringa trees is more than 10 years old, so I don’t water it at all.  It depends on rainwater.  I live in Phoenix, so that means there’s not much humidity in the air and we only get about 8 inches of rain per year.  And the tree is happy, produces gorgeous leaves and pods and is extremely fertile because I now have moringa popping up throughout the yard.
  • It loves the sun! The best location for a moringa tree is a spot that receives full sunlight, typically eight or more hours of light per day.
  • Although moringa plants can survive in poor soil if needed, they thrive in well-drained, sandy soils.  They are sensitive to root rot, so soil that holds too much moisture isn’t ideal.   

After all of that, I still believe moringa is a must-have. If you decide to grow it, you won’t regret it because once established it is actually easy to grow and maintain.  They are low maintenance and require little care.

How to Plant Moringa Seeds

Moringa is a warm-season crop so you’ll want to make sure any risk of frost is gone.

The seeds need warm summer nights to thrive, so keep them at about 60℉, in a location that gets sunlight most of the day.  If they don’t get enough light, it could stunt their growth.

Most gardeners plant them directly in the soil where they plan to keep the tree.  Some say immature seedlings often die when transplanted because they are delicate.  My experience with moringa is that it’s extremely fertile, it sprouts throughout my yard like a weed.  So if it survives that easily on its own, it is definitely feasible even if you don’t think you have a green thumb!

Dig a hole that’s about one-foot deep and wide, then fill it with a mixture of soil and compost. Plant four to five seeds about an inch deep into the hole, keeping the seeds two inches apart.  You can use a finger to push a hole into the soil and just drop in the seeds. 

Next, you’ll want to water the seeds right away. Moringa seeds tend to germinate within one to two weeks.

Keeping them moist will give the best chance of germination, but you don’t want to drown them.

If after watering there is water sitting on top of the soil, you’ve probably watered too much.

Once the trees are established, they are drought resistant.  But until then, the plants and immature trees still need water to survive.  Depending on your climate, once per week is usually sufficient.  I stick my finger in the soil up to my second knuckle.  If it feels dry, it can probably use watering.

When it comes to watering the established plants, infrequent deep watering tends to do better than frequent light watering.

As for fertilizer, one way to save is by using compost.  Just apply a three to four inch layer of compost around the tree regularly; regularly depends on the age of your tree.

Now you’re ready to reap all of the benefits of owning your moringa tree!  You no longer need to leave home for medicine.

And don’t forget to save your pods which are filled with fresh seeds, ready for germination!

Still need seeds?  Check out our Etsy shop for moringa and other medicinal seeds. 

Health

Anise

Wait until I tell you about this wonder herb called anise! 

Anise is a flowering plant in the Apiaceae family with “roots” in Southwest Asia and in the eastern Mediterranean. The seeds and oil from this herb are most commonly used to make medicine, but some people also use the roots and leaf part of anise. You can find or grind your own anise powder as a supplement as well! Anise has a semi-sweet taste and flavor almost like black licorice. This distinct flavor and fragrance of anise is sometimes used in natural soaps, lotions, and perfumes. I even read that the use of anise has been traced back to 1500 B.C. in Egypt!

And guess what?! Anise is a natural remedy for stomach aches and indigestion that can cause uncomfortable gas. The seeds contain an oil called anethole that can aid in food digestion. Anise also stimulates the production of gastric “juices” that make it easier for your body to regulate digestion without causing uncomfortable gas and pain. This powerful herb also contains anti-fungal properties that combat gas build-up and fermentation in the bowels. 

How do you use it?

The most popular way to consume anise is in tea form! You can buy pre-made anise herbal tea from most health food stores, and you can also use the whole seeds to brew tea. Whole seeds can be chewed on their own, but if you’re not a fan of crunchy seeds, then I would recommend brewing a nice cup of anise herbal tea. 

Ground or whole anise seeds can also be added to dough when baking and the extracted oil can be added to beverages for flavor. If you like the taste of licorice, then you will most likely love adding a hint of anise to foods of your choice.

I found ground and whole anise seeds, even powder online and in grocery stores.  But with all of these benefits, why not grow your own.

Here’s what you need to know to grow:

Anise is simple to grow in places like Arizona! To get started, find a location with full sunlight and well-drained soil. Plant the seeds about a half inch deep. You will need to water anise until it progresses into a grown plant (about 6-8 inches high), and then you can gradually reduce irrigation. By this point, it can withstand periods of drought and dry weather, which makes it perfect to grow in desert-like climates! The best time to harvest your anise is when the flowers have gone to seed so that you can collect those seeds, dry them out and save some of them for more planting!

Email us and let us know how you use anise! 

Health

Yarrow

The wound healing, fever reducing herb


Yarrow is a famed medicinal plant native to temperate regions of the Northern Hemisphere in Asia, and Europe and North America. 

The plant compounds are supposed to benefit wound healing, digestive issues, reduce symptoms of depression and anxiety, aid in brain health, and flight inflammation. 

Fun Fact: Yarrow is known for treating nosebleeds by putting a pinch of the plant in the nostril where the bleeding is and blowing it out after the bleeding has stopped fully. 

It’s use as a circulatory system remedy comes from its ability to stop bleeding and move stagnant blood, preventing and clearing blood clots. It tones the blood vessels and lowers high blood pressure.


Dried, powdered yarrow can be used to stop bleeding by sprinkling the wound with yarrow powder or you can use fresh leaves and flowers; just wet them and apply pressure. 

The dried, powdered yarrow can also applied after wounds are cleaned and be used to make wound healing salves.

Here’s a Salve Recipe

Melt around ½ oz of beeswax and mix with at least 4 oz of Yarrow oil and a few drops of any other essential oil if you’d like as well to create a balm like texture to use as a moisturizer, a lip balm, or as a burn salve!


Where do you get Yarrow?


I’ve seen dried yarrow flower, yarrow oil and yarrow tea all over the internet, but you can also grow it to make your own meds!

Yarrow grows best in sunny areas and in well-drained soil. 

To dry your yarrow, hang whole stems in bunches or place them on brown paper in a warm dry place. Allow a few weeks to go by and you will find them dry! Strip the leaves and flowers off the stems and crumble for use in tea. 

Yarrow Tea 

Use 1 teaspoonful of dried yarrow per cup of boiling water, and let it steep for 10 minutes. Strain and drink warm. 

If you are experiencing a cold or a fever you can drink some every two hours or at least three cups a day until you start feeling better. 

For cuts or abrasions use externally as a wash for cuts. 

For a healthy scalp and shiny hair use as a hair rinse. Just take the yarrow oil and mix it with a carrier oil.  Applying it to your scalp is supposed to help stimulate new hair growth.

Other uses for yarrow tea: 

  • Colds and fevers 
  • Scanty menstruation 
  • Heavy periods 
  • Menstrual clotting 
  • High blood pressure 
  • To tone varicose veins 
  • To prevent blood clots 
  • Tension
  • Weak digestion


Where do you get yarrow?

I’m always a promoter of growing your own.  Yarrow likes full sun and although it does best in well drained soil, it will also thrive in poor, dry soils – you just won’t get as big of a harvest.